Accessibility
In this section, I will now explain how to use the subway for people with disabilities. Even if this does not apply to you, it might be useful to you if you are traveling with strollers, bikes, pieces of luggage and similar large items. There are many different kinds of disabilities but I will focus mostly on people with mobility impairment. For consistency, I will use the term people with disabilities, but acknowledge that different people have different preferences in regards to identity-first vs. person-first language.
Let me first tell you the bad news: the subway is notoriously difficult to use for people with disabilities. It is unfortunate that one of the largest and busiest transportation systems in the world has such a poor record in supporting people of all abilities. The subway system was originally built in the early 20th century long before the ADA, the American Disabilities Act which mandates making public areas accessible to everyone, was established in 1990. As of 2022, only ~30% of the 472 subway stations are considered accessible. The Metropolitan Transportation Authority (MTA) is continuing to retrofit additional stations for accessibility, albeit at a slow pace. For the foreseeable future, the majority of subway stations is still inaccessible and we have to learn how to navigate it.
Reduced-Fare AutoGate MetroCard
People with disabilities or who are accompanied by service animals or even senior citizens above 65 years of age can apply for the Reduced-Fare AutoGate MetroCard. As the name implies this personalized MetroCard allows you to use the subway (and buses) at the 50% of the base fare (i.e., $1.45 instead of $2.90 for each ride). The application process can be done via mail or in-person at the MetroCard Customer Service Center in downtown or at MetroCard bus/van which periodically tours various neighborhoods around the city at a given schedule. You need to provide proof of disability or age and bring a passport photo, two valid forms of IDs including one with a picture. Once approved, you will receive a personalized white-looking MetroCard. For more information on how to apply, see this.
For residents, you can also combine this card with the EasyPay option which automatically refills the Reduced-Fare MetroCard using a credit card when it reaches a low balance. This has the additional benefit that it caps the automatic refill at exactly half the cost of the regular monthly Unlimited Ride MetroCard. In other words, once you have paid 50% of the cost of the regular Unlimited Ride MetroCard, all remaining rides for the remaining month are free.
The option to apply for this Reduced-Fare AutoGate MetroCard is also available to tourists visiting New York City as long as you can provide proof of disability or age at the MetroCard Customer Service Center on 3 Stone St, New York, NY 10019. Remember to bring two forms of IDs and a passport photo. Once approved, you will receive a temporary Reduced-Fare MetroCard on the spot.
Accessible subway stations
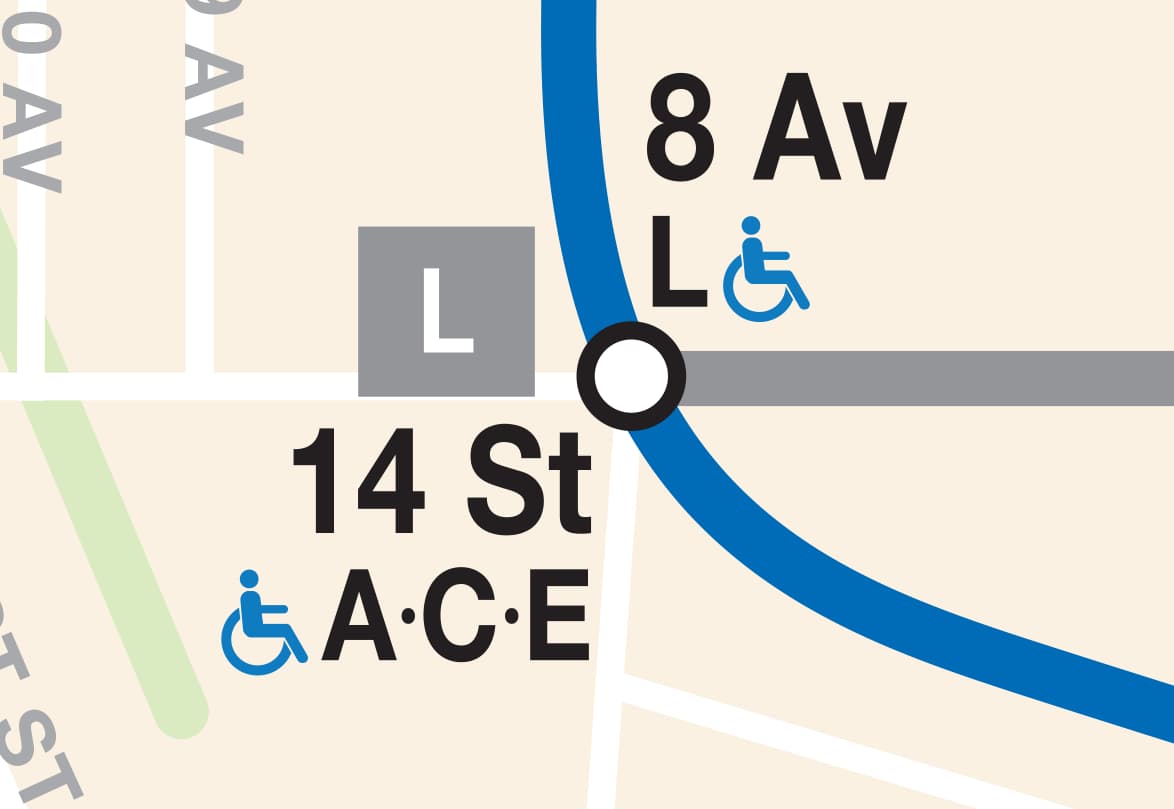
As mentioned before, only a portion of subway stations are accessible in accordance with the American Disabilities Act (ADA). On the official subway map, you can recognize ADA-accessible subway stations with the blue wheelchair sign next to the subway service names underneath the subway station:
You can also find the list of accessible stations on the official MTA website here. An ADA accessible station generally implies that you can reach any train in any direction without taking the stairs. This usually means that the entire station is accessible via elevators and ramps, but there are many exceptions and they are usually called out on the map like in this example:
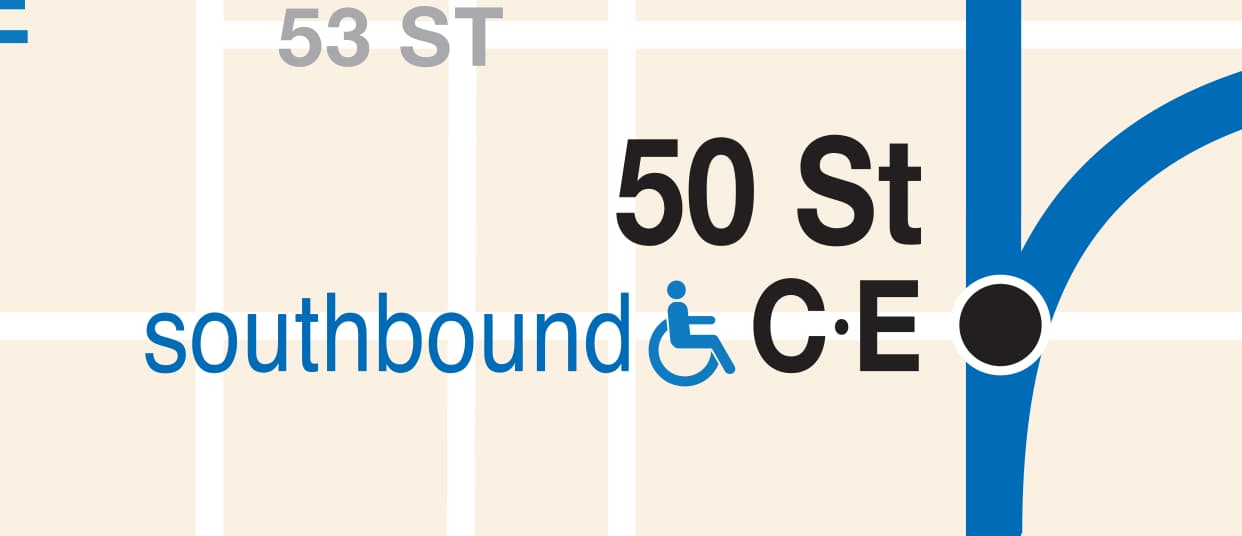
At this station, only the southbound (downtown) C and E platform has an elevator.
It is very possible that the closest subway station near your journey’s start or destination is not accessible, so you have to find other nearby accessible stations for your journey. Sometimes it is worth the extra effort to go to another subway station with an elevator than schlepping your stroller/luggage up and down the stairs at a desired station. You also need to take into account that when you transfer between subway services that the station where the transfer occurs is also accessible. Most mapping applications such as Google Maps and Apple Maps also have an option to get public transit directions using accessible stations only.
Furthermore, because elevators do routinely go out of service for maintenance and cleaning, you should verify on the MTA website that all the elevators required for your complete journey are in fact in service.
Each subway station has a different layout. In some stations, the trains are literally right below the street requiring only a single elevator to reach them, while other stations are very complex with multiple levels requiring you to take 3-4 different elevators just to get to the trains. That said, a fairly common setup that you see a lot consists of two levels underground:
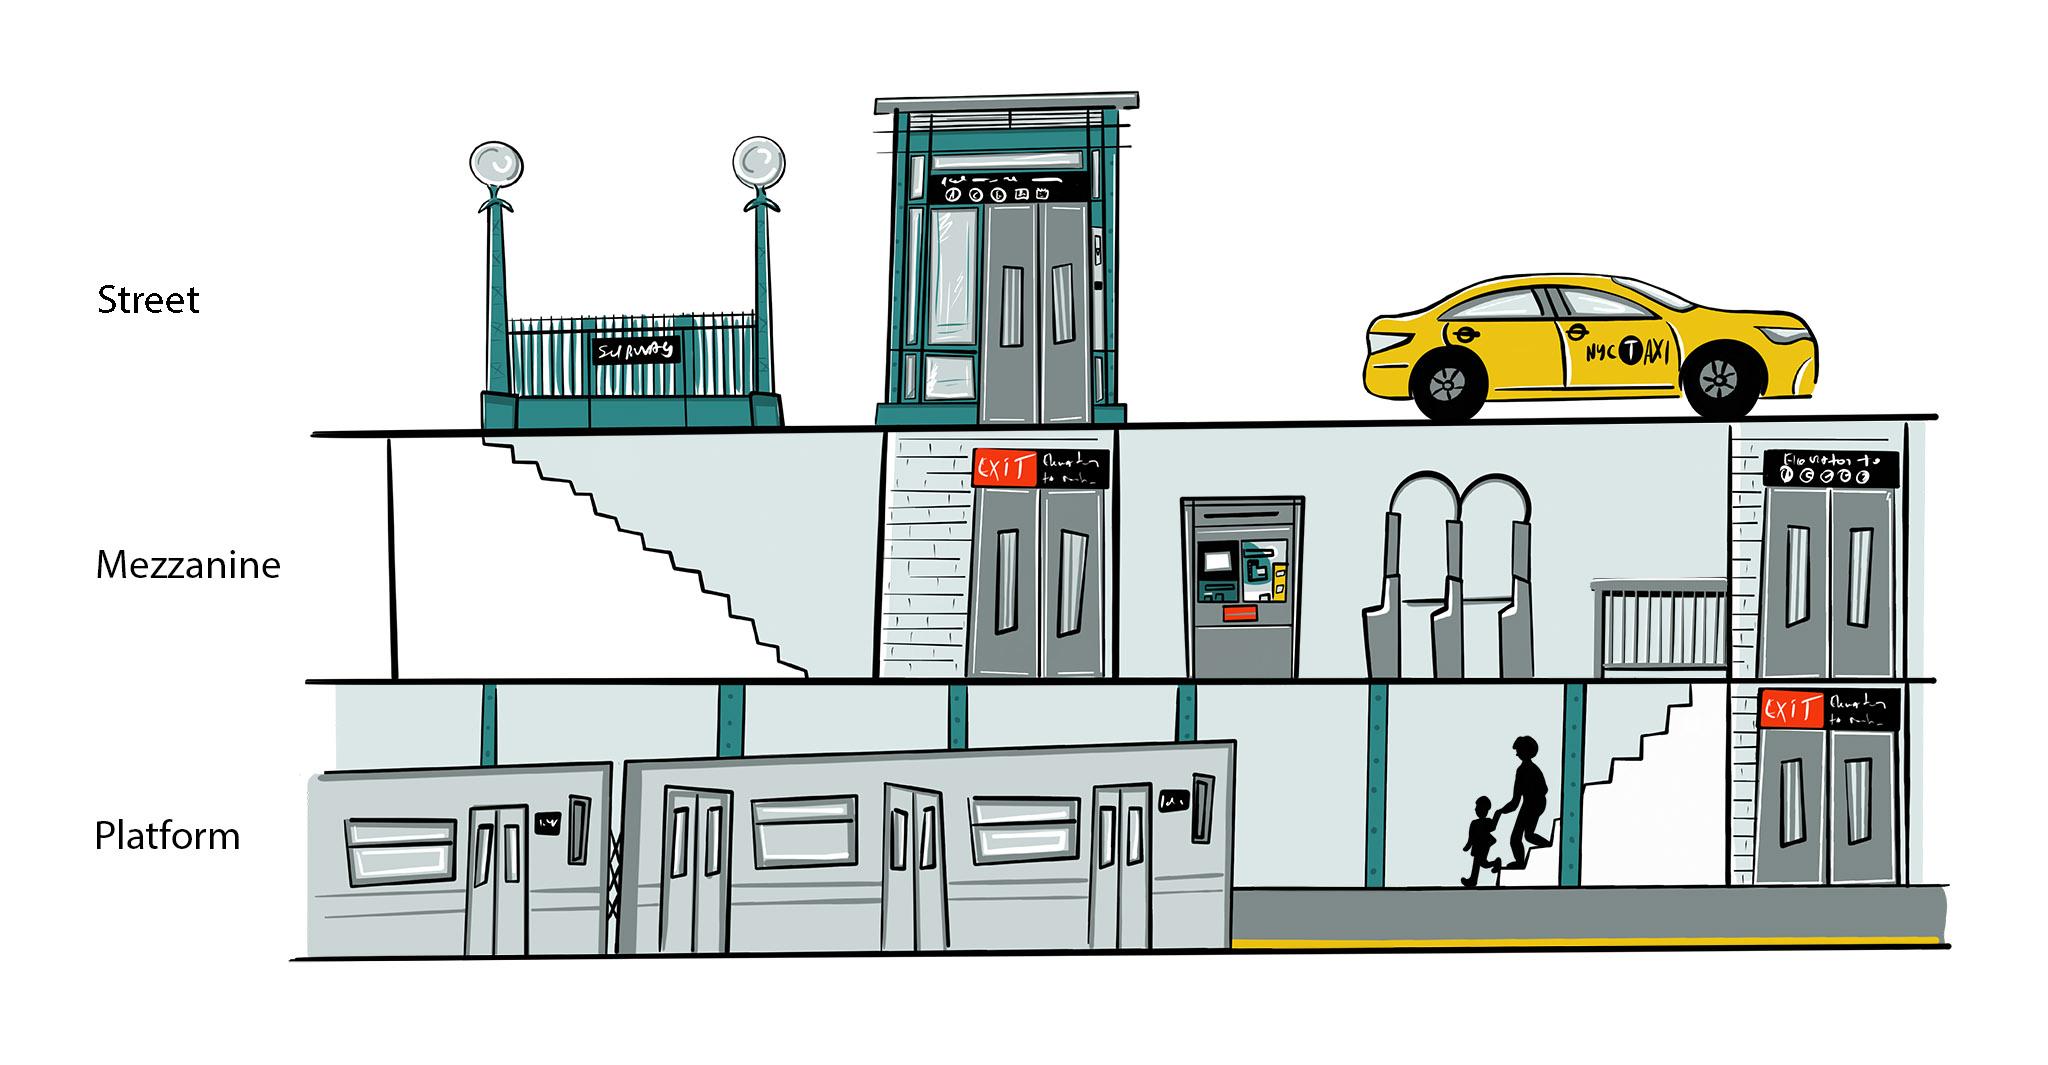
In this setup the first floor underneath the street level is called the mezzanine level. It is on this level, where you can find the MetroCard Vending Machines to buy MetroCards and the turnstiles to enter the subway system. The floor below that is the platform level (or sometimes called concourse) where you can enter the subway trains. This means that you have to take at least two different elevators to get from street level to the trains.
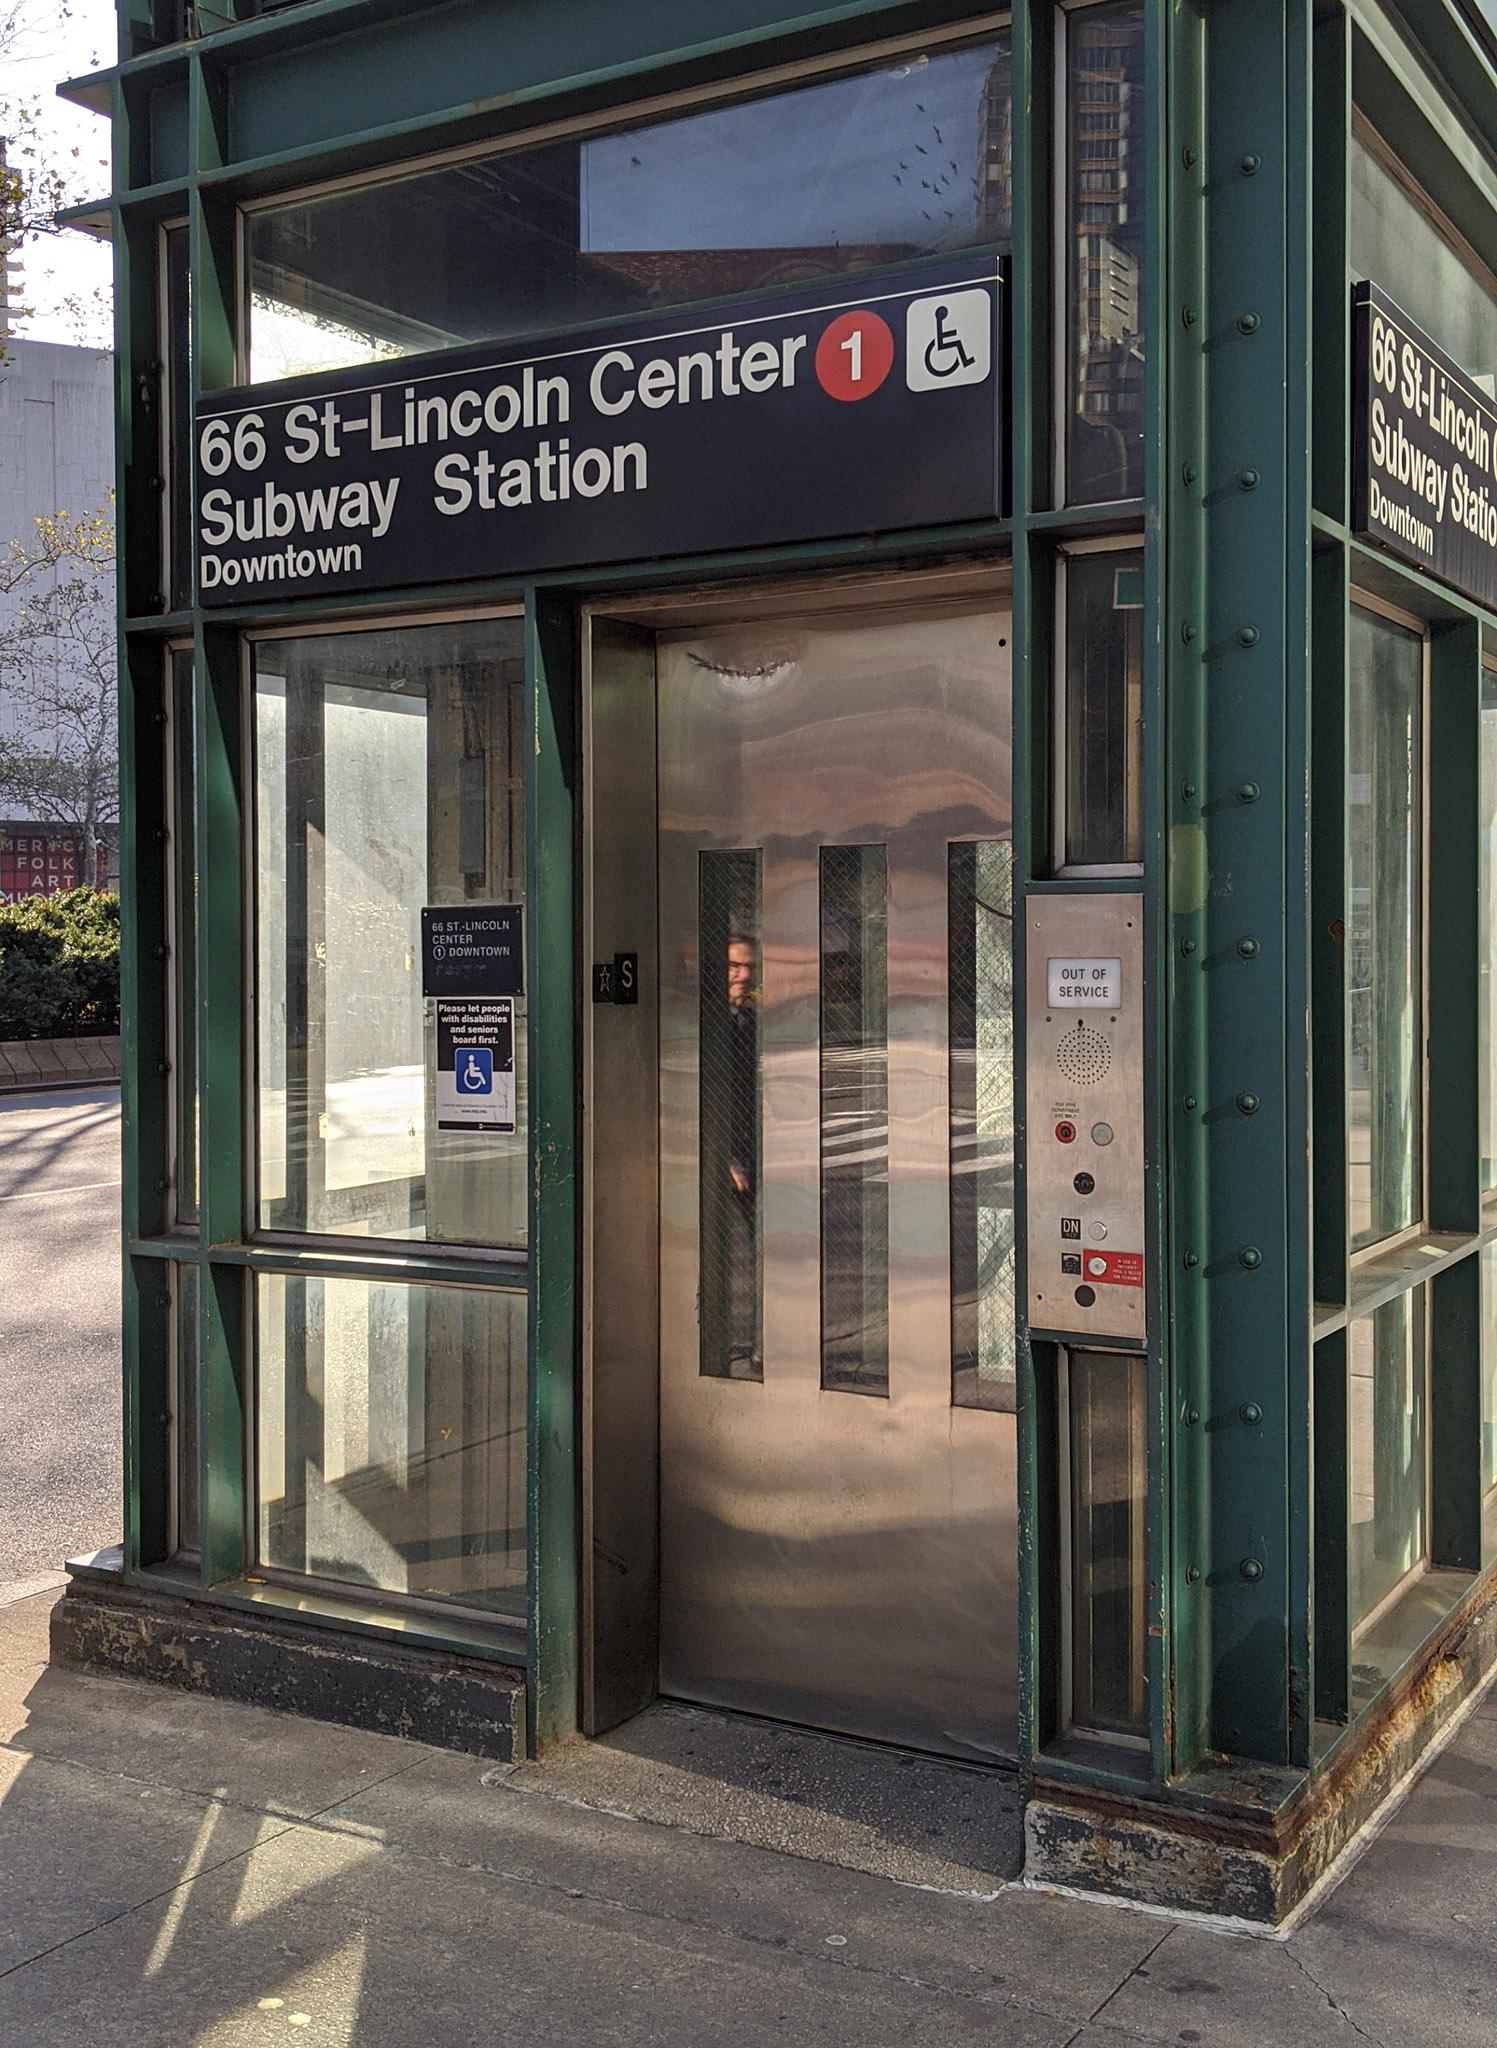
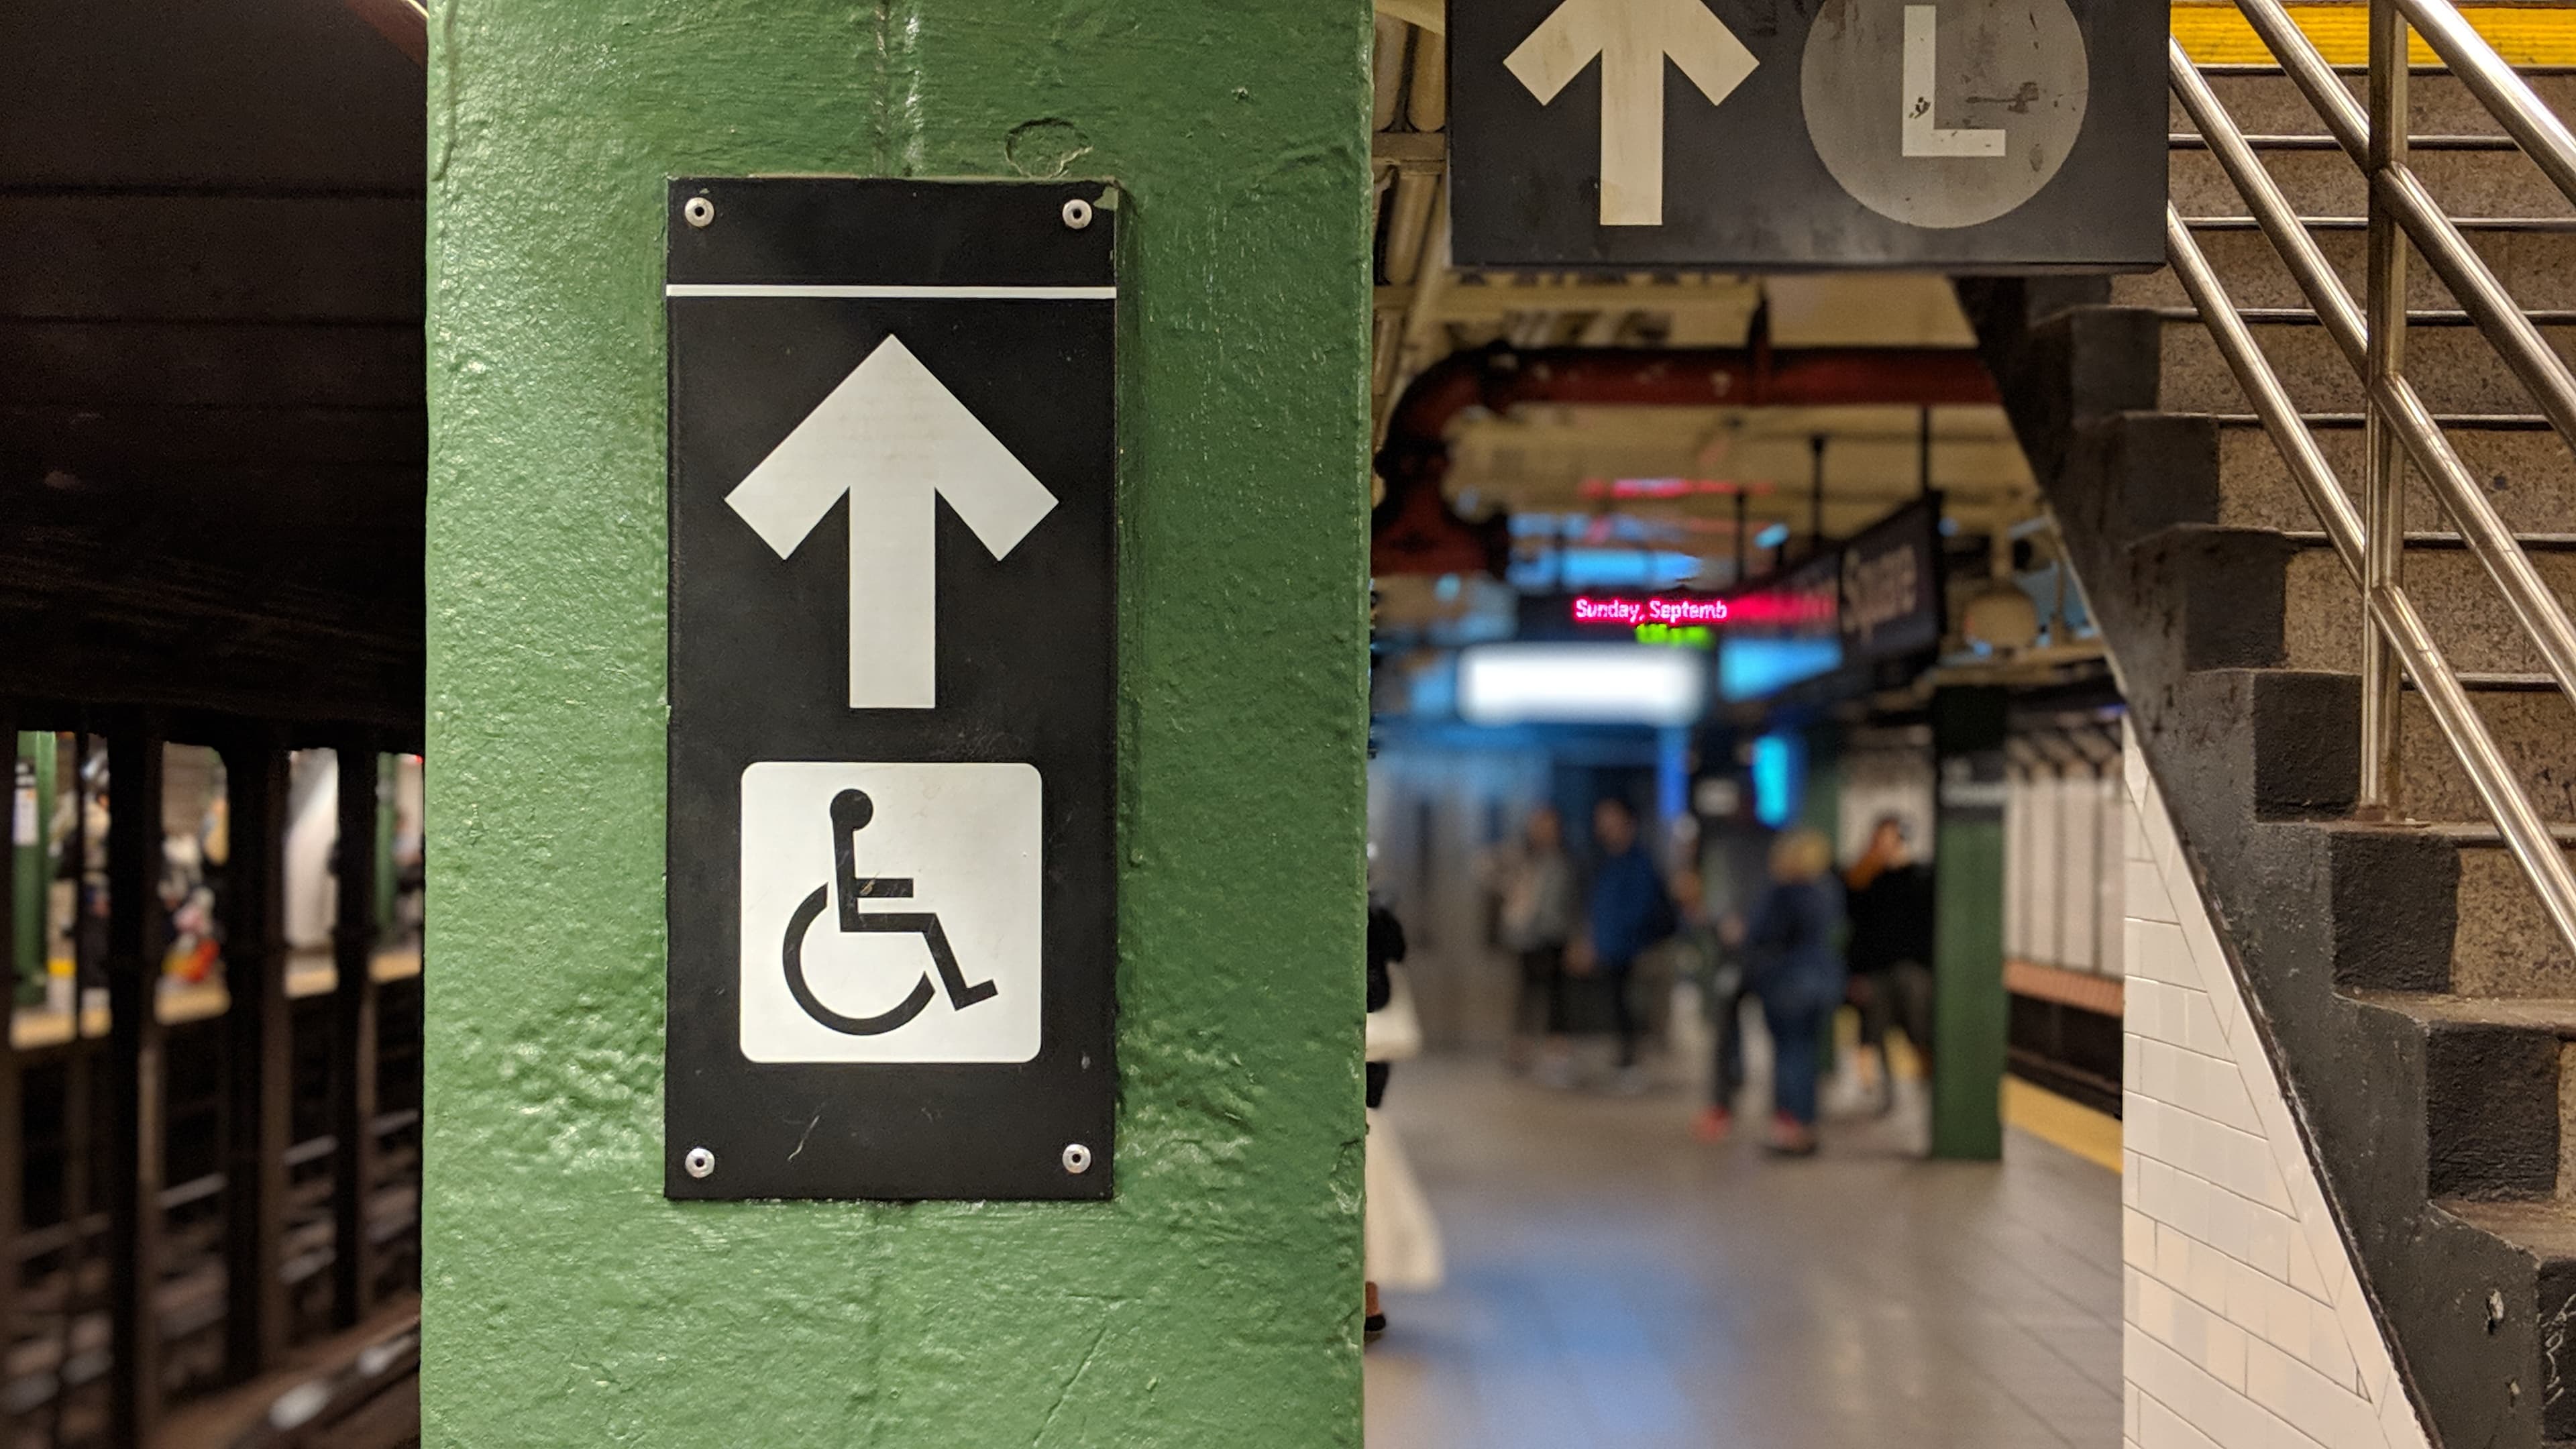
On the street level, despite the subway station having multiple entrances, you are likely only going to find one or two elevators. The signage at the subway station entrances will point you to where can find the nearest elevator:
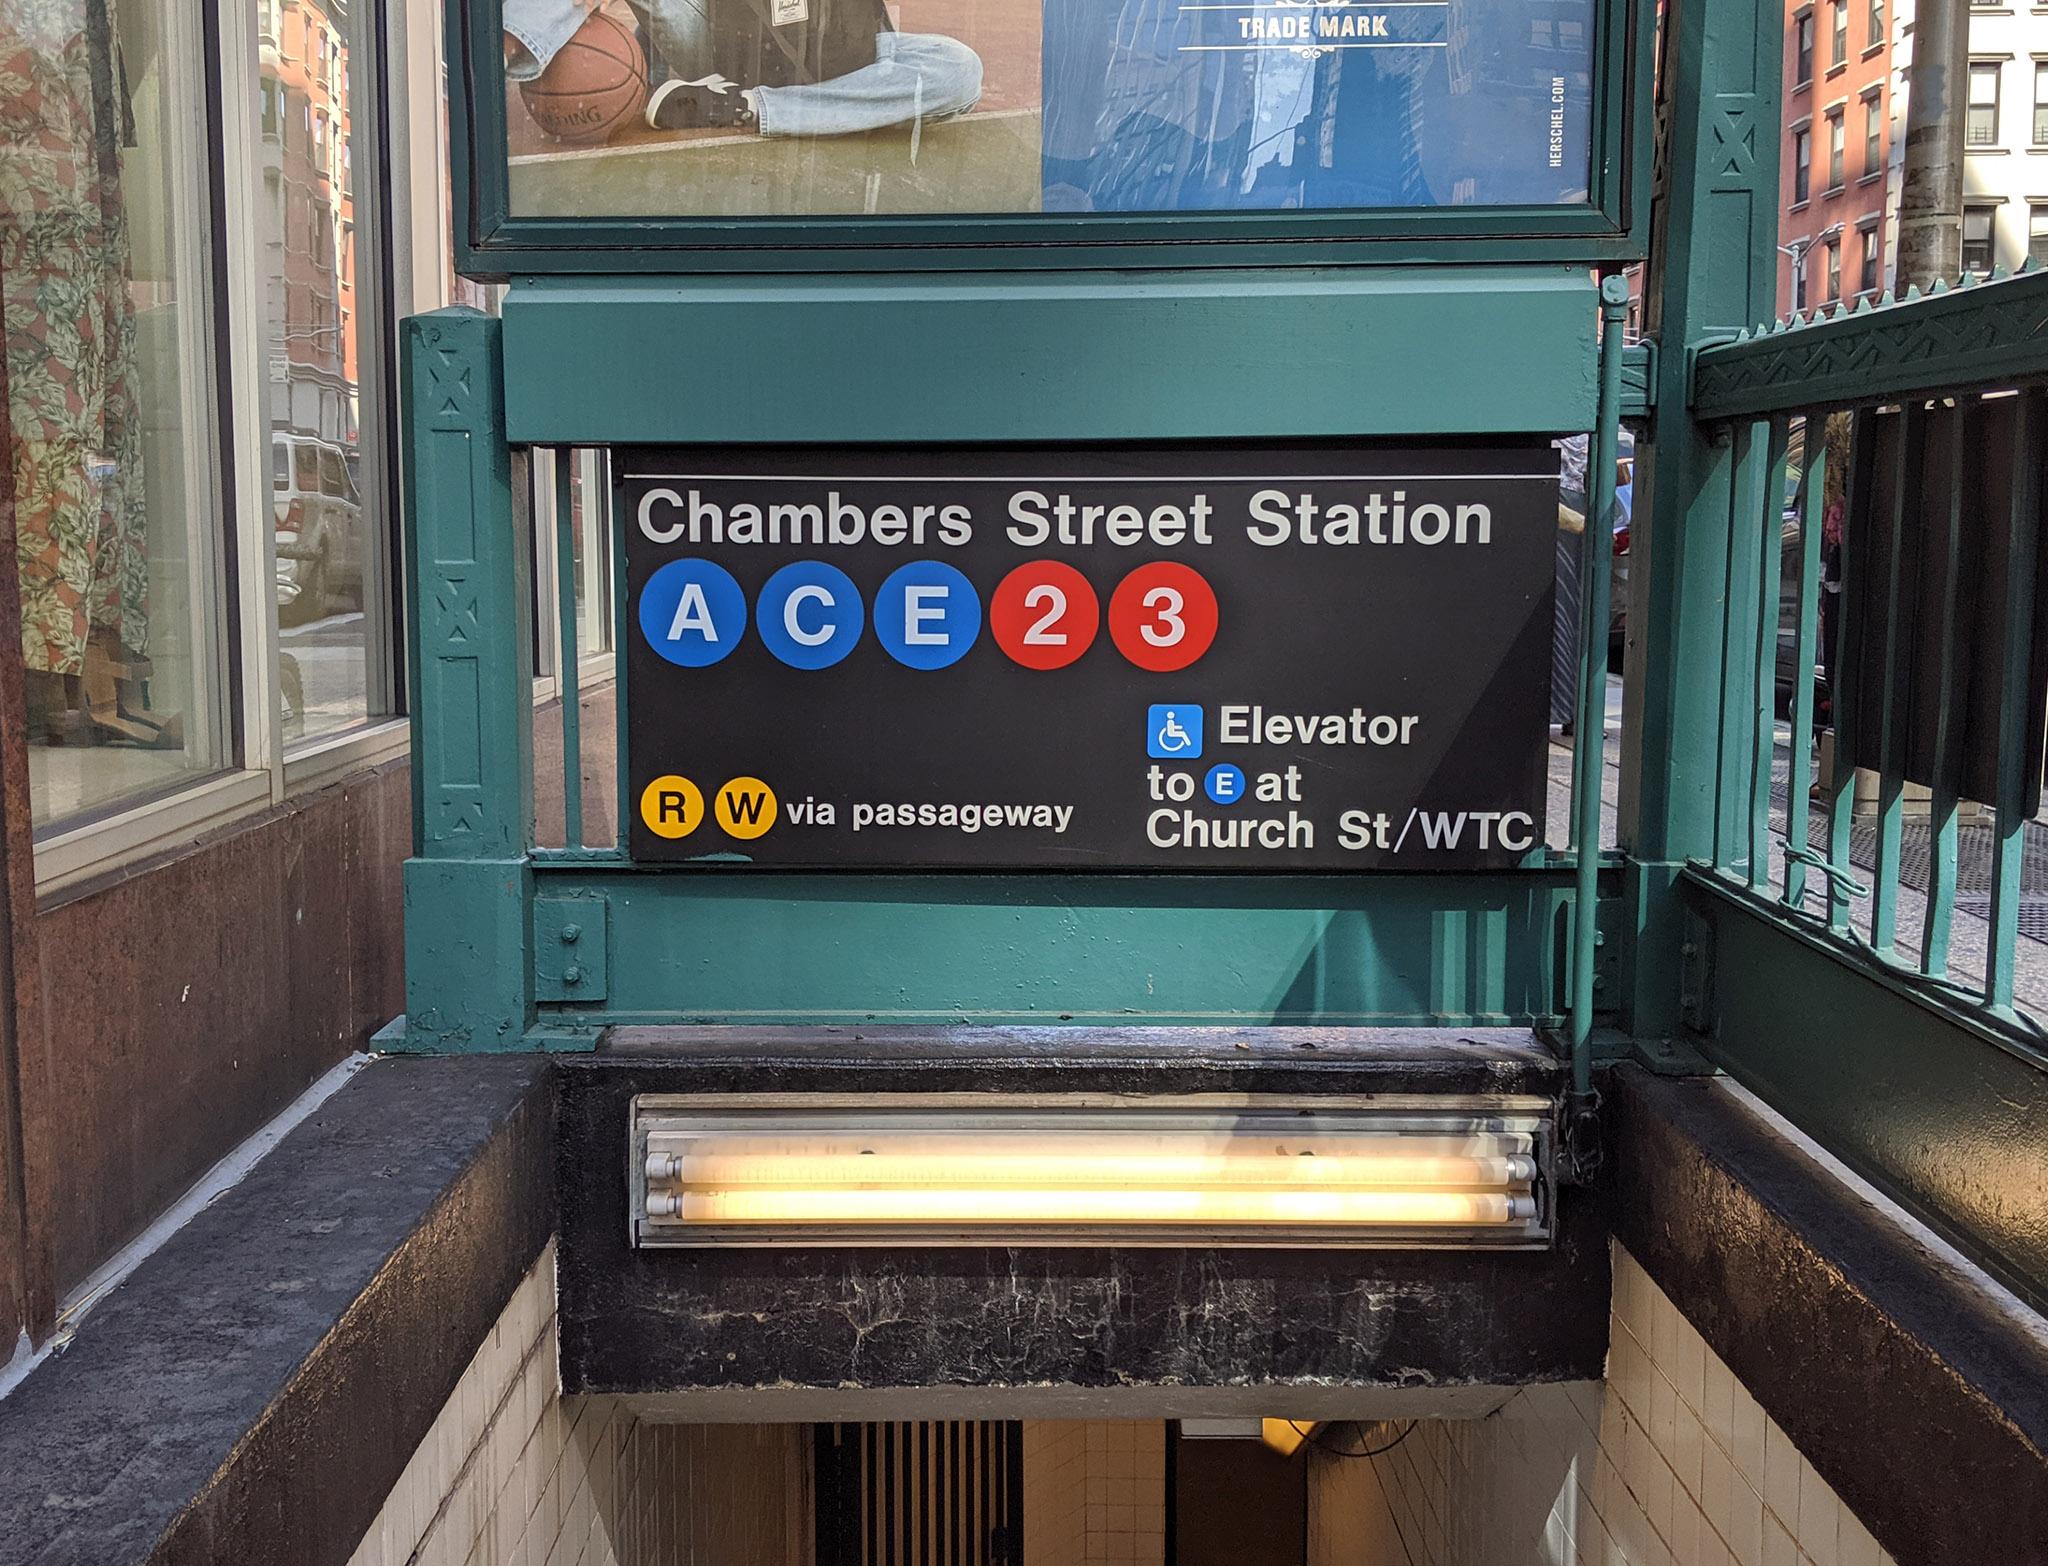
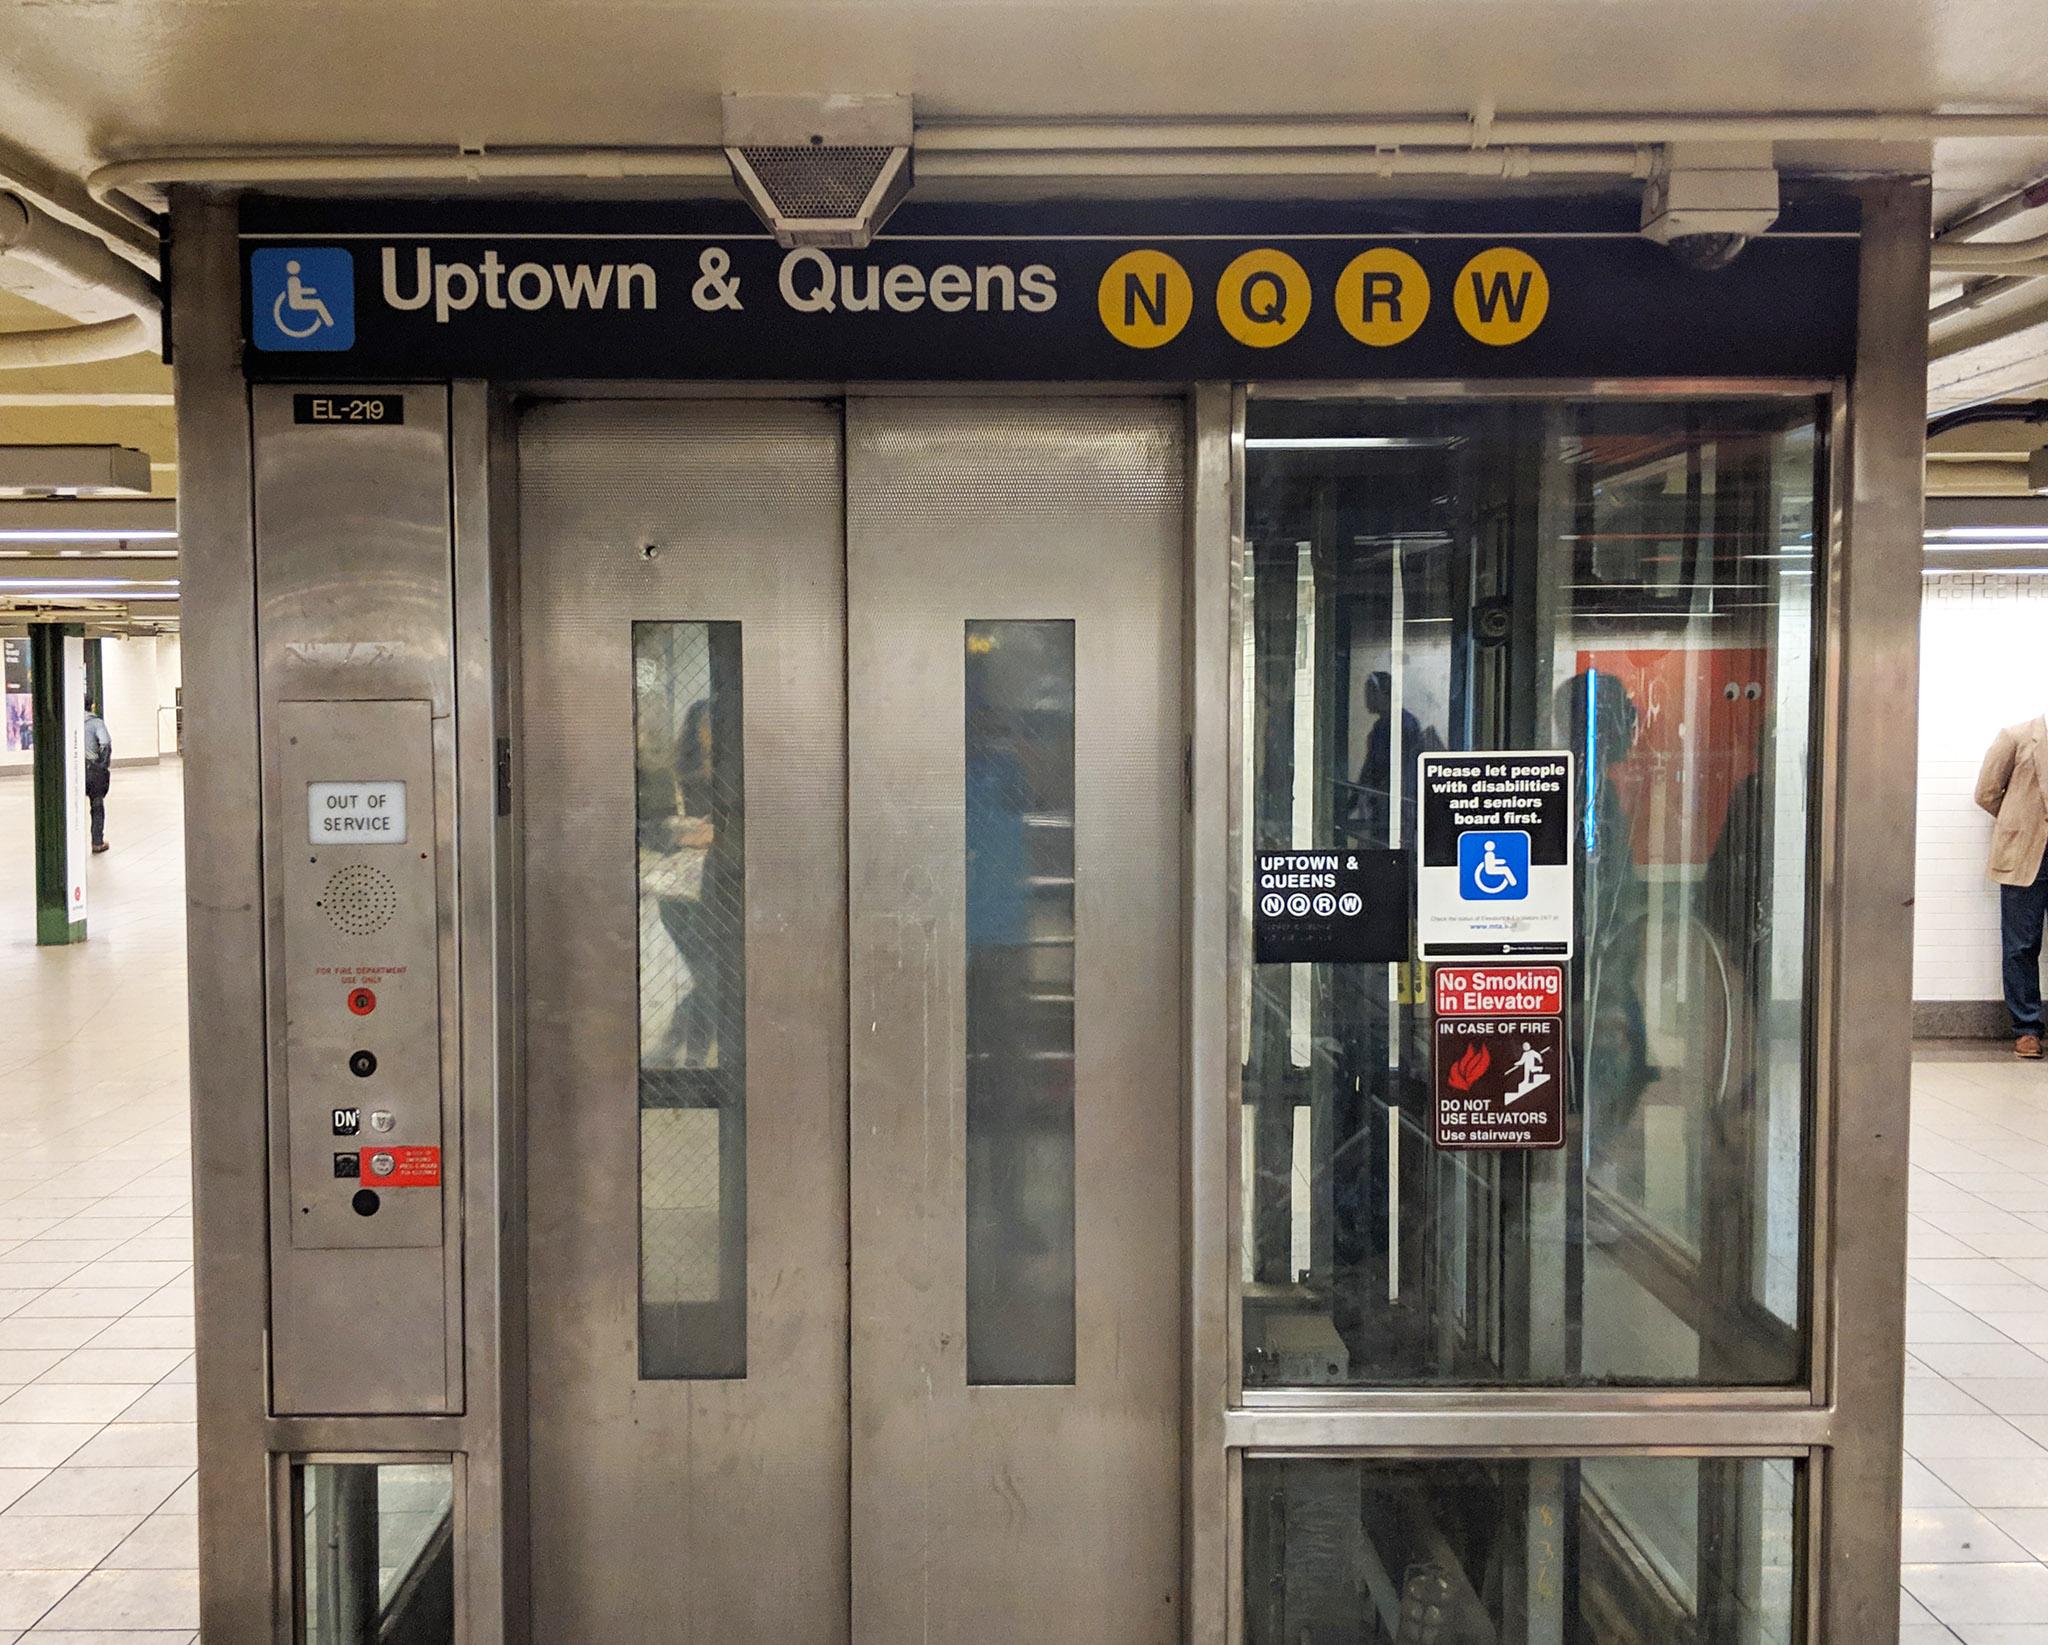
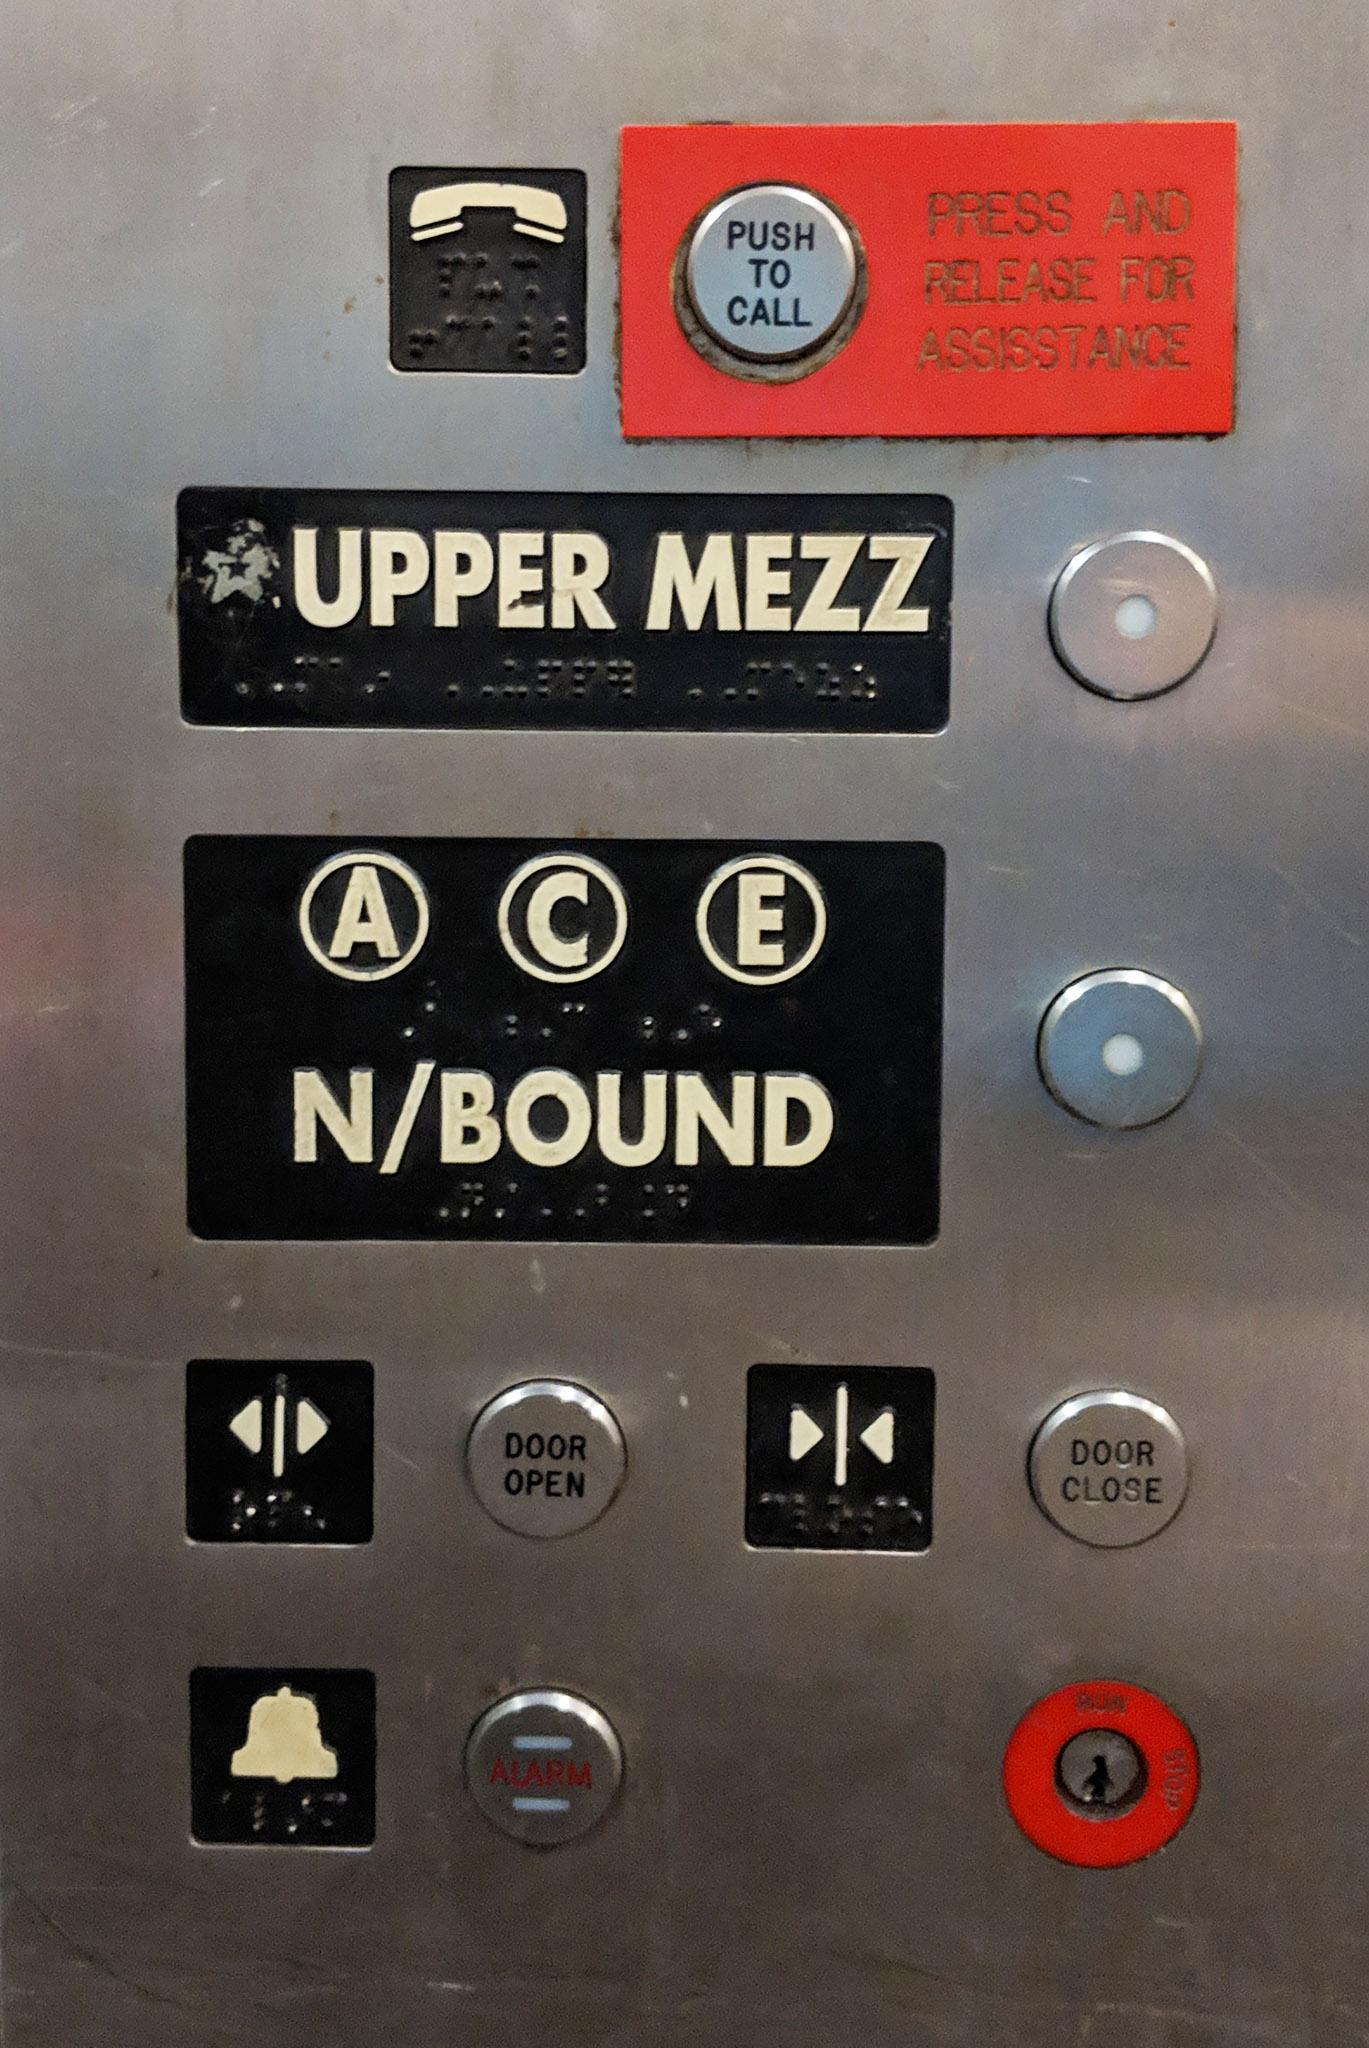
Before entering the elevator, make sure to read the signage above it to verify that this will get you to the desired train and direction. For instance, some elevators only take you to the downtown service, so you have to find another elevator if you want to head uptown:
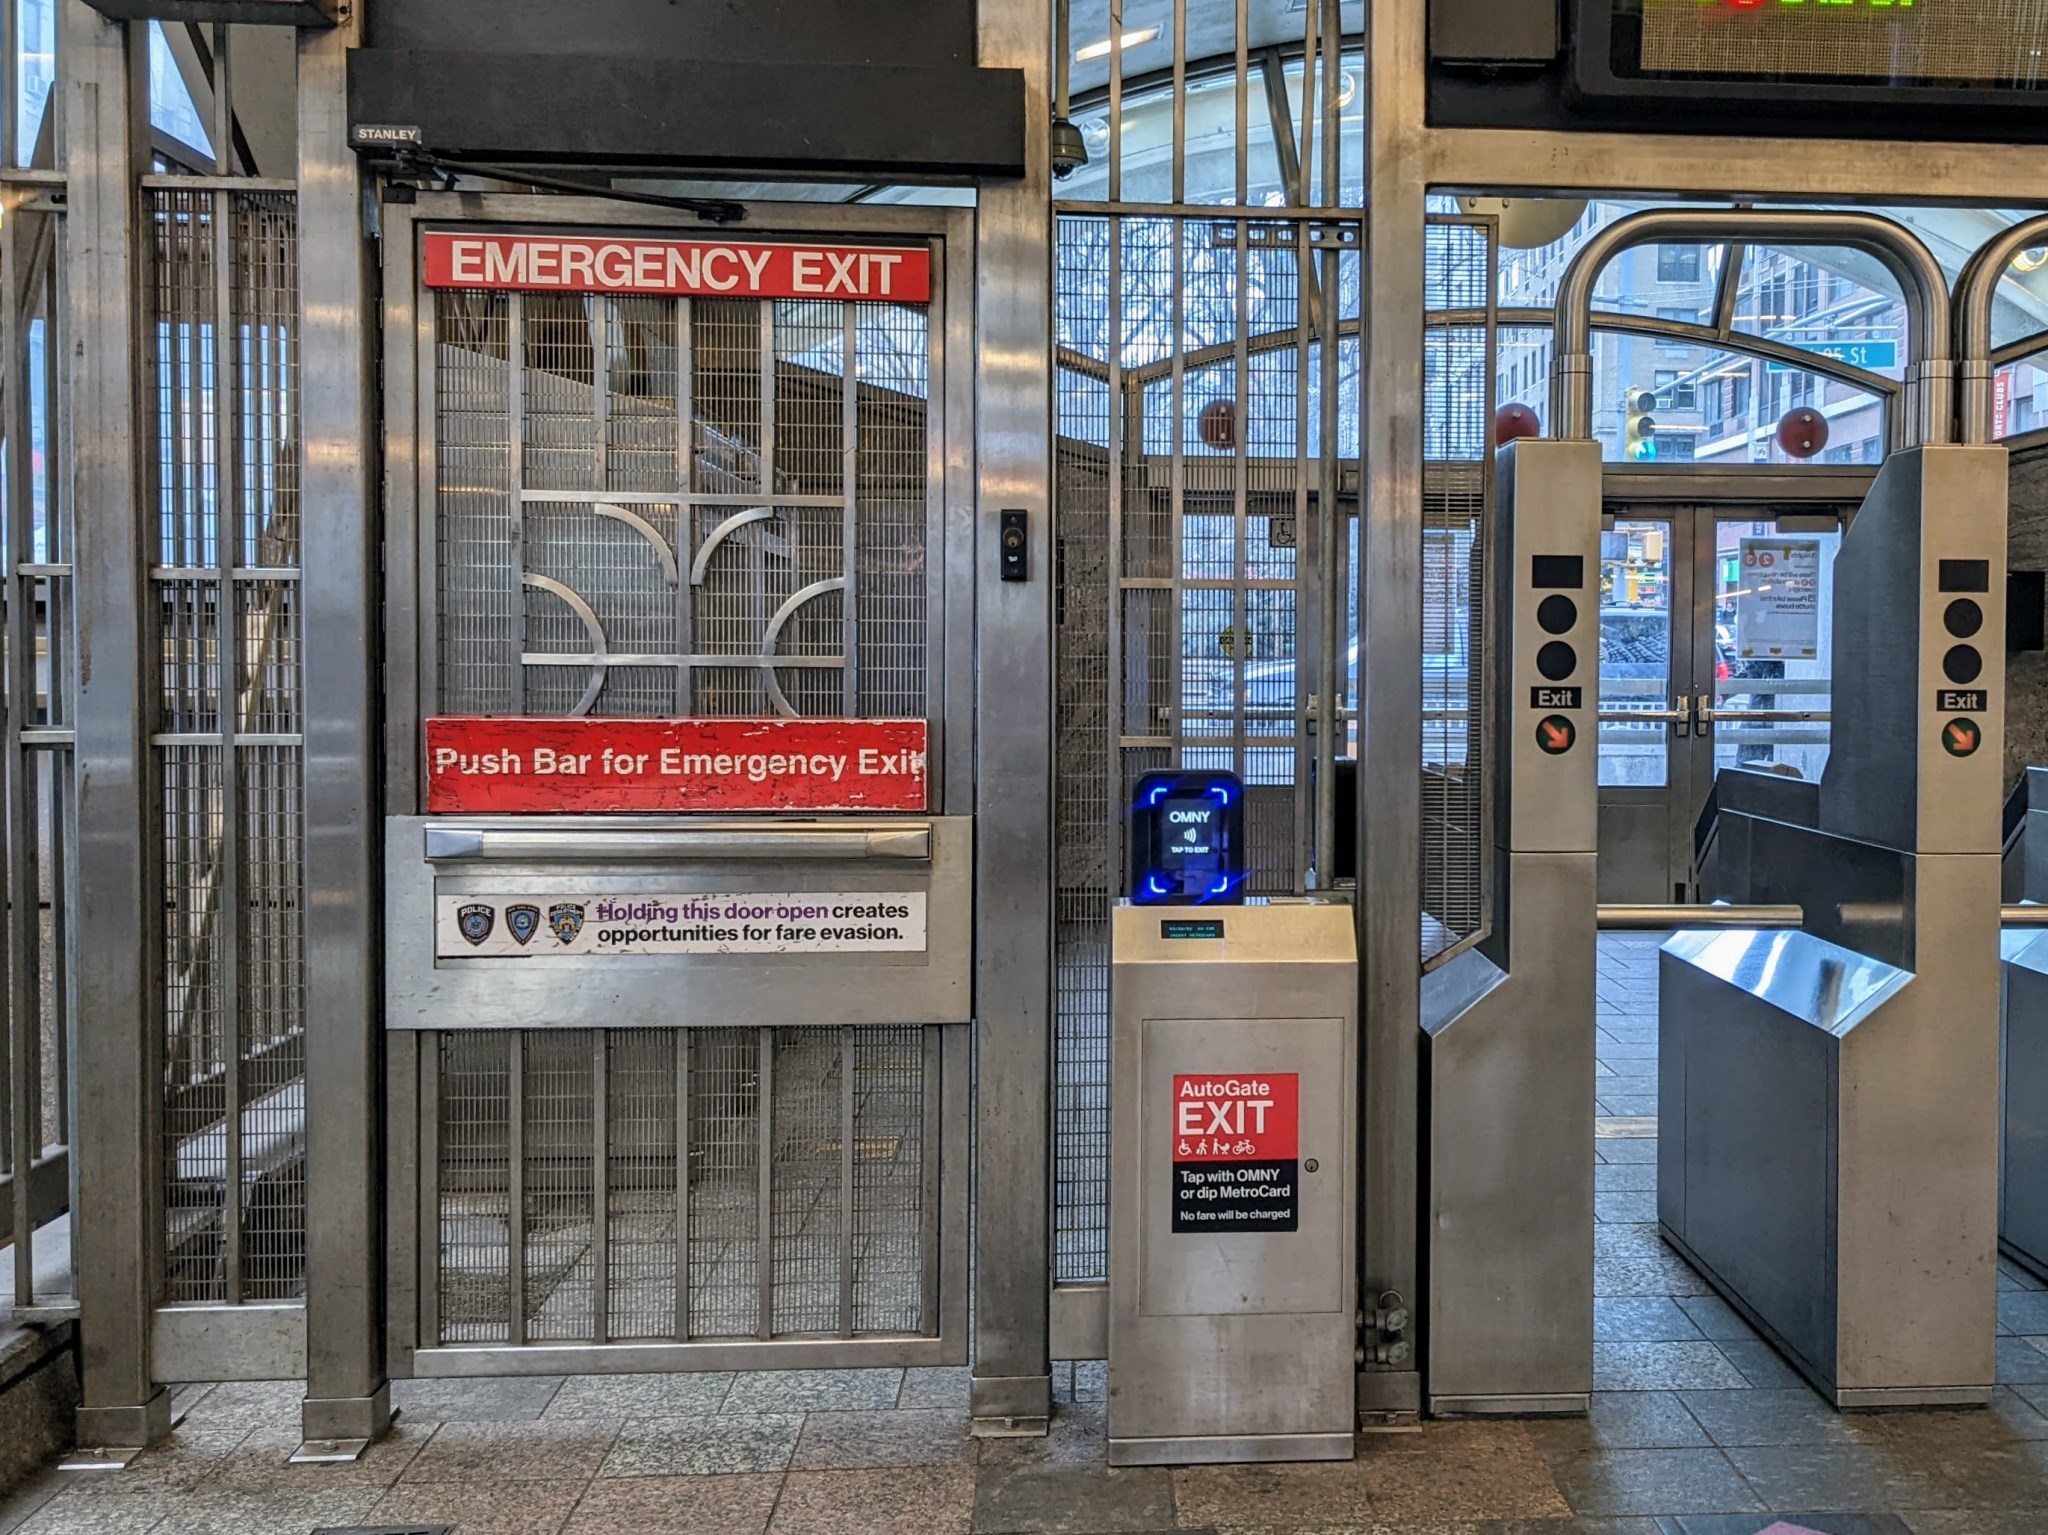
On the Mezzanine level, in order to enter the turnstiles, first locate the entry doors that are near the turnstiles and have a little small machine/reader labeled "AutoGate" next to them:
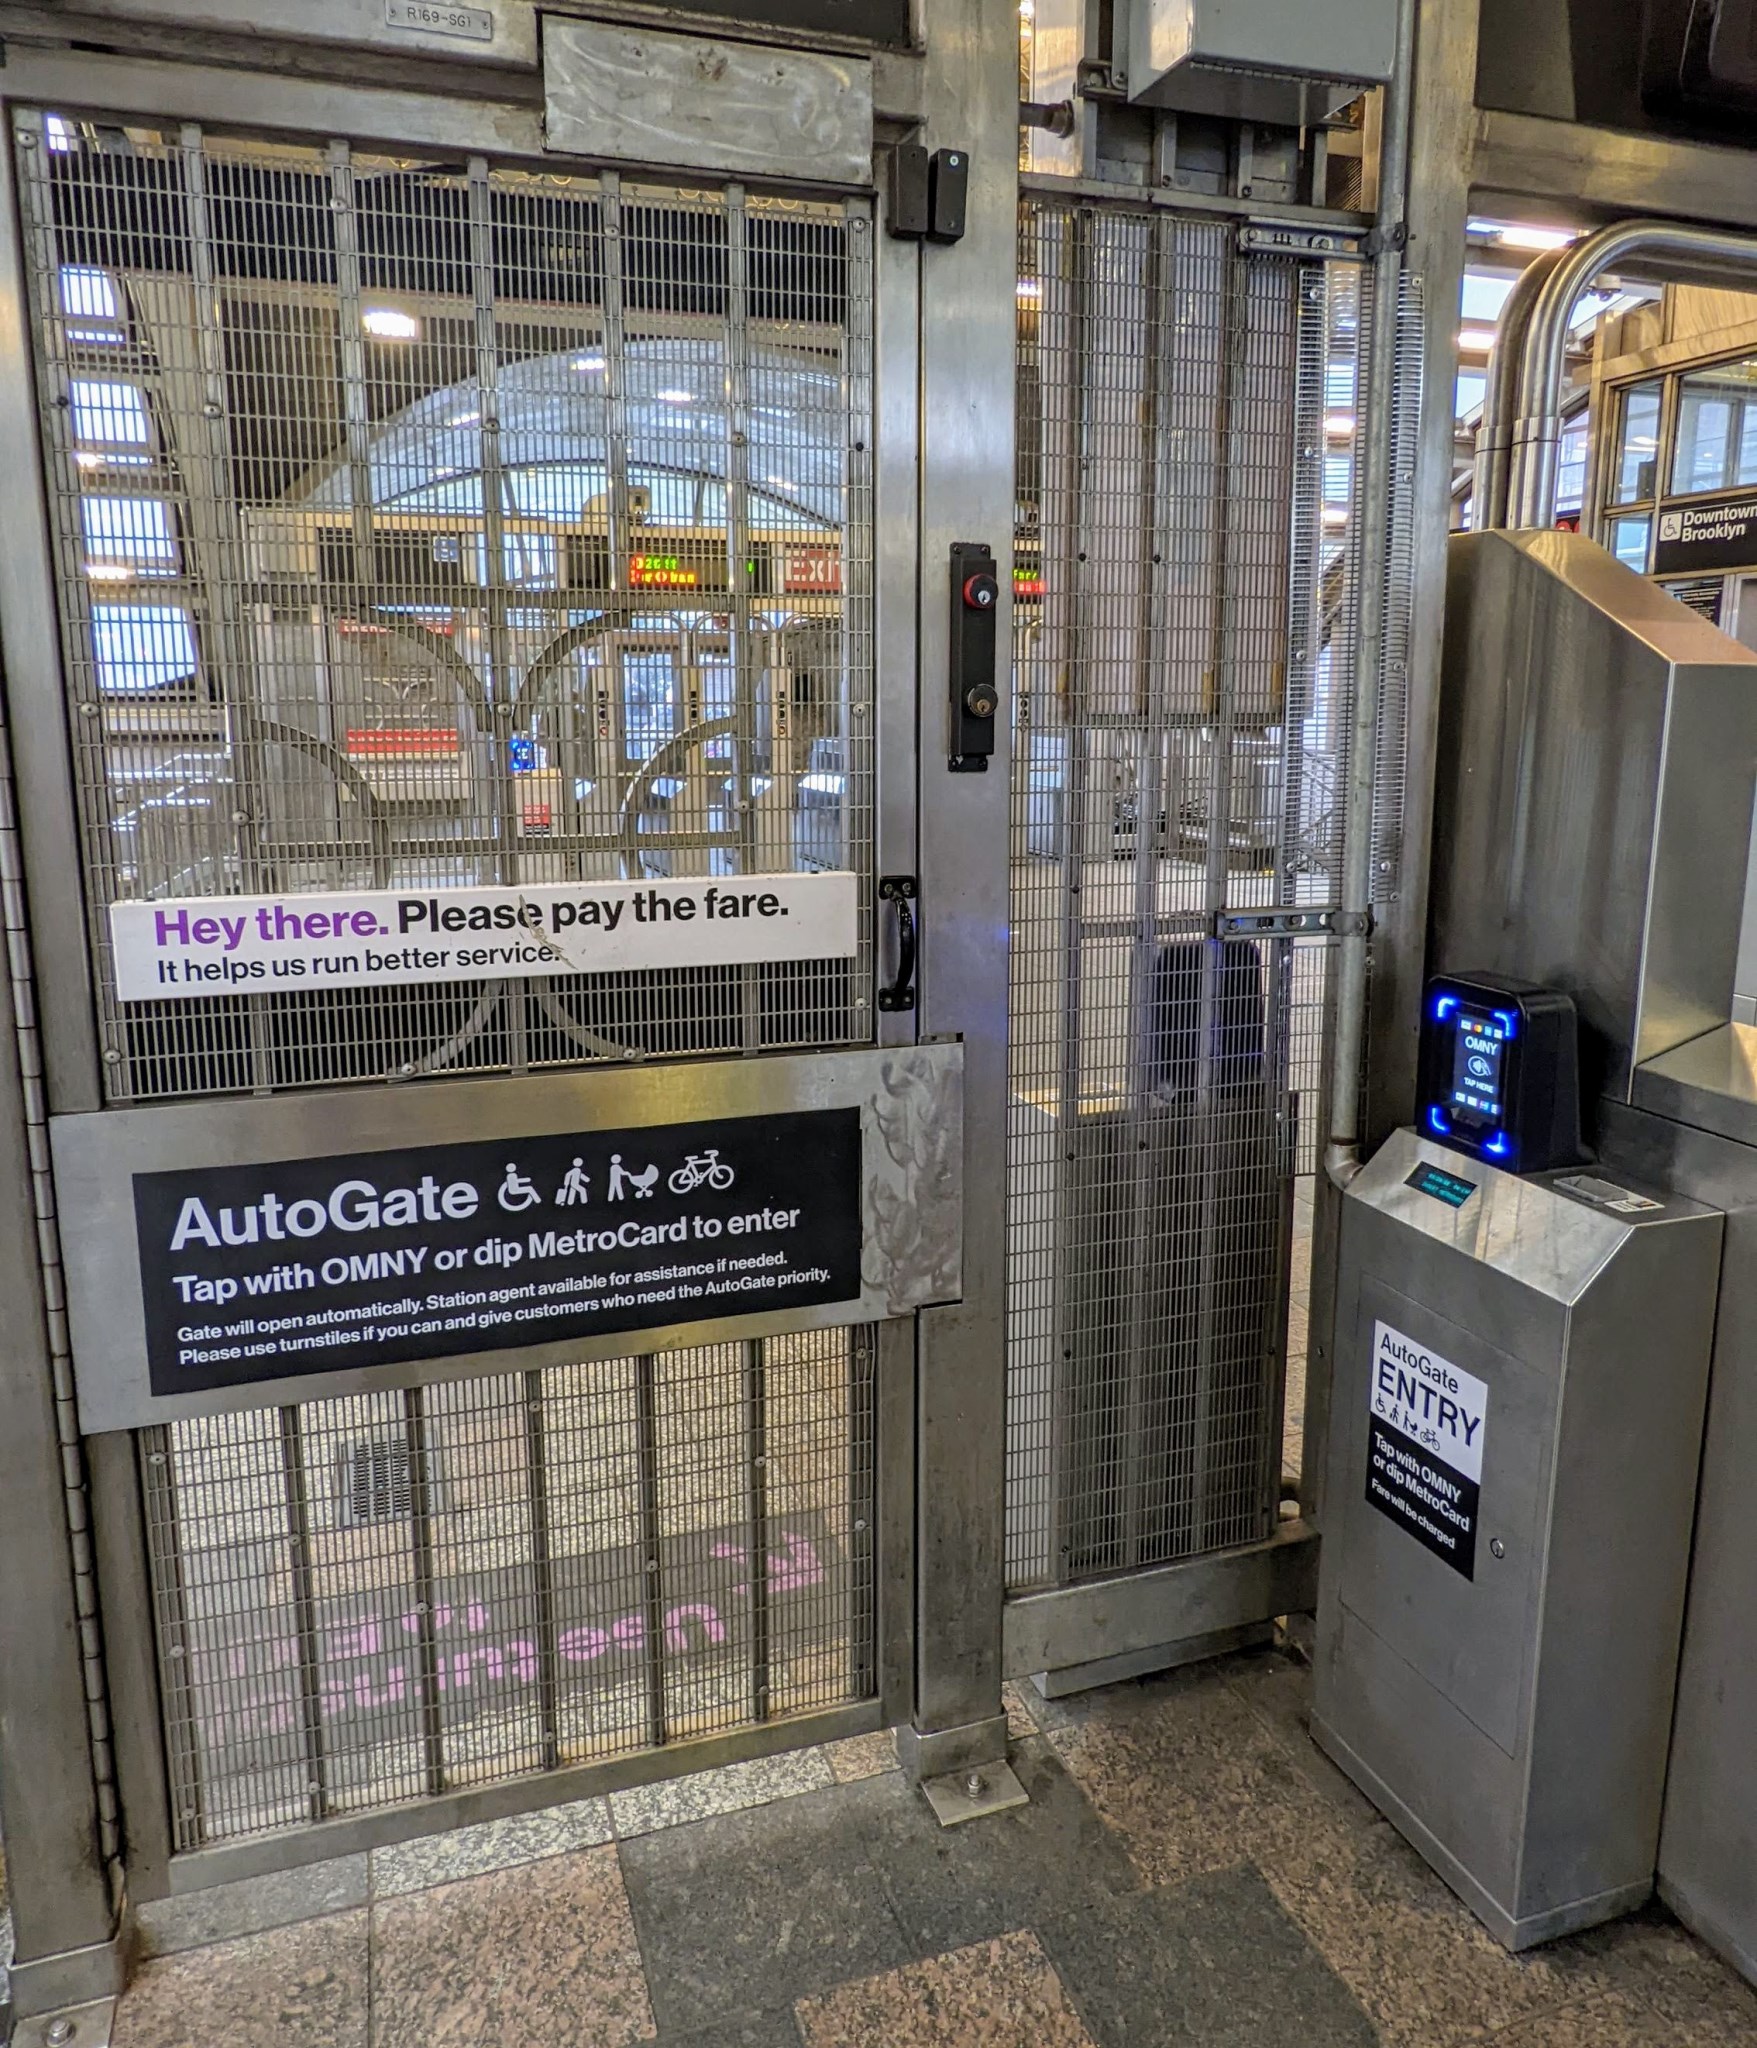
The doors are also sometimes labeled "AutoGate" as well. Note that not every door will have this AutoGate machine reader, but there exists at least one in any given accessible station -- you might have to just go around and find an entrance that does. The AutoGate machine/reader has both an OMNY reader as well as a slot at the top for the old MetroCards:
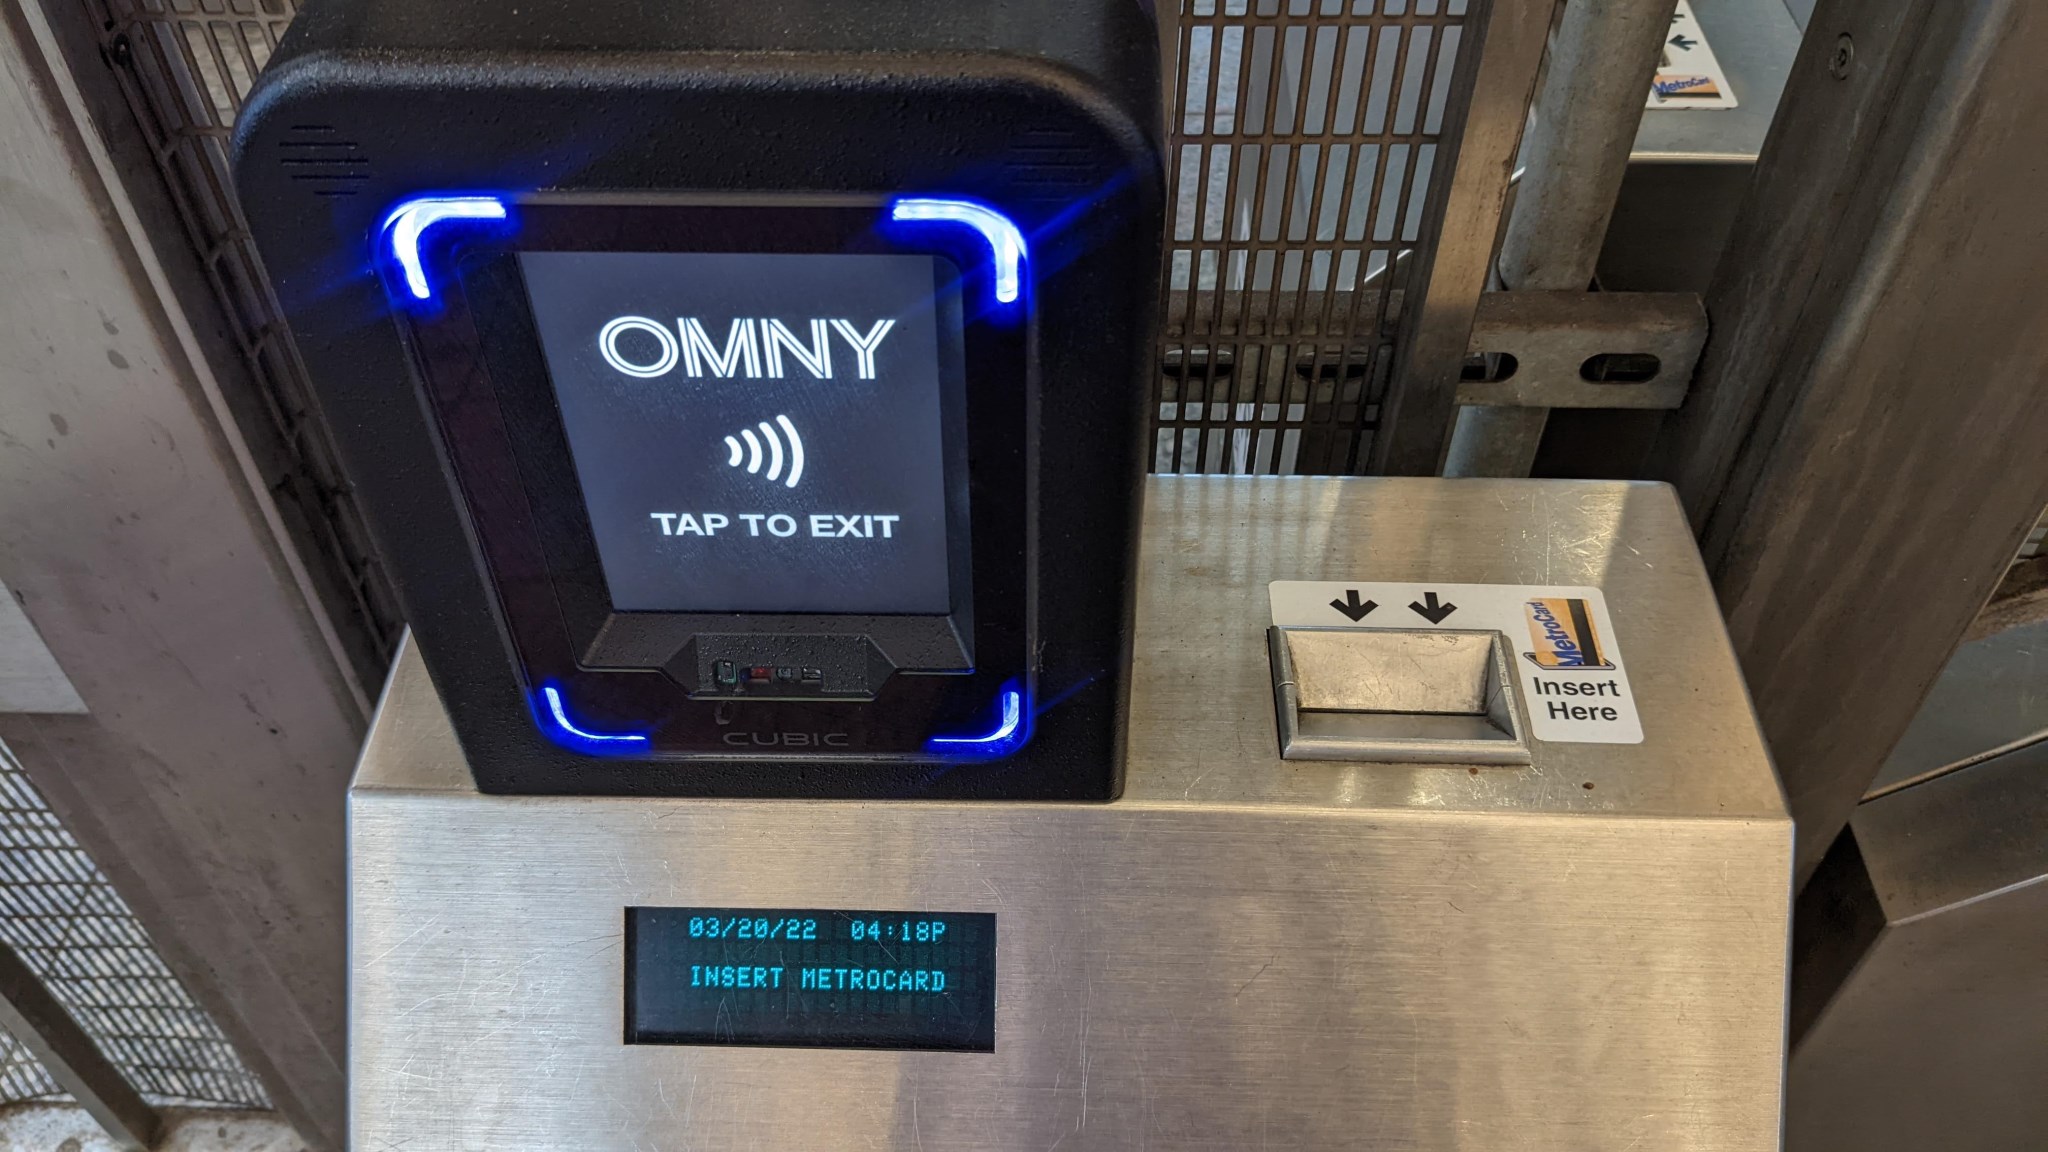
Now, either swipe your OMNY device against the OMNY reader or dip your MetroCard into the slot at the top of the AutoGate (you will get it back). The door will then automatically open and will remain open for a few seconds for you to go through effortlessly.
Now that you passed the turnstiles, find the next appropriate elevator to get down to the platform level. As before, make sure to read the signage above the elevator, as there will be different elevators for different services and directions:
A few notes about elevators:
- They aren’t particularly clean, and you will encounter elevators that have unpleasant smells.
- As mentioned, elevators routinely go out of service, and there is usually signage directing you to alternatives, which might include going to a different nearby station. You can view a current list of out-of-service elevators and escalators here.
- During rush hours, elevators at large transfer stations are very busy, so you might have to wait a long time to be able to get onto the elevator.
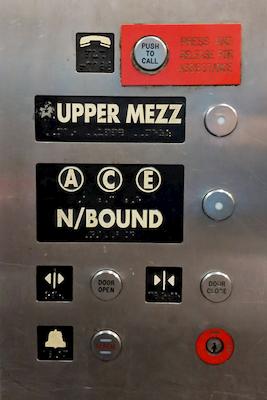
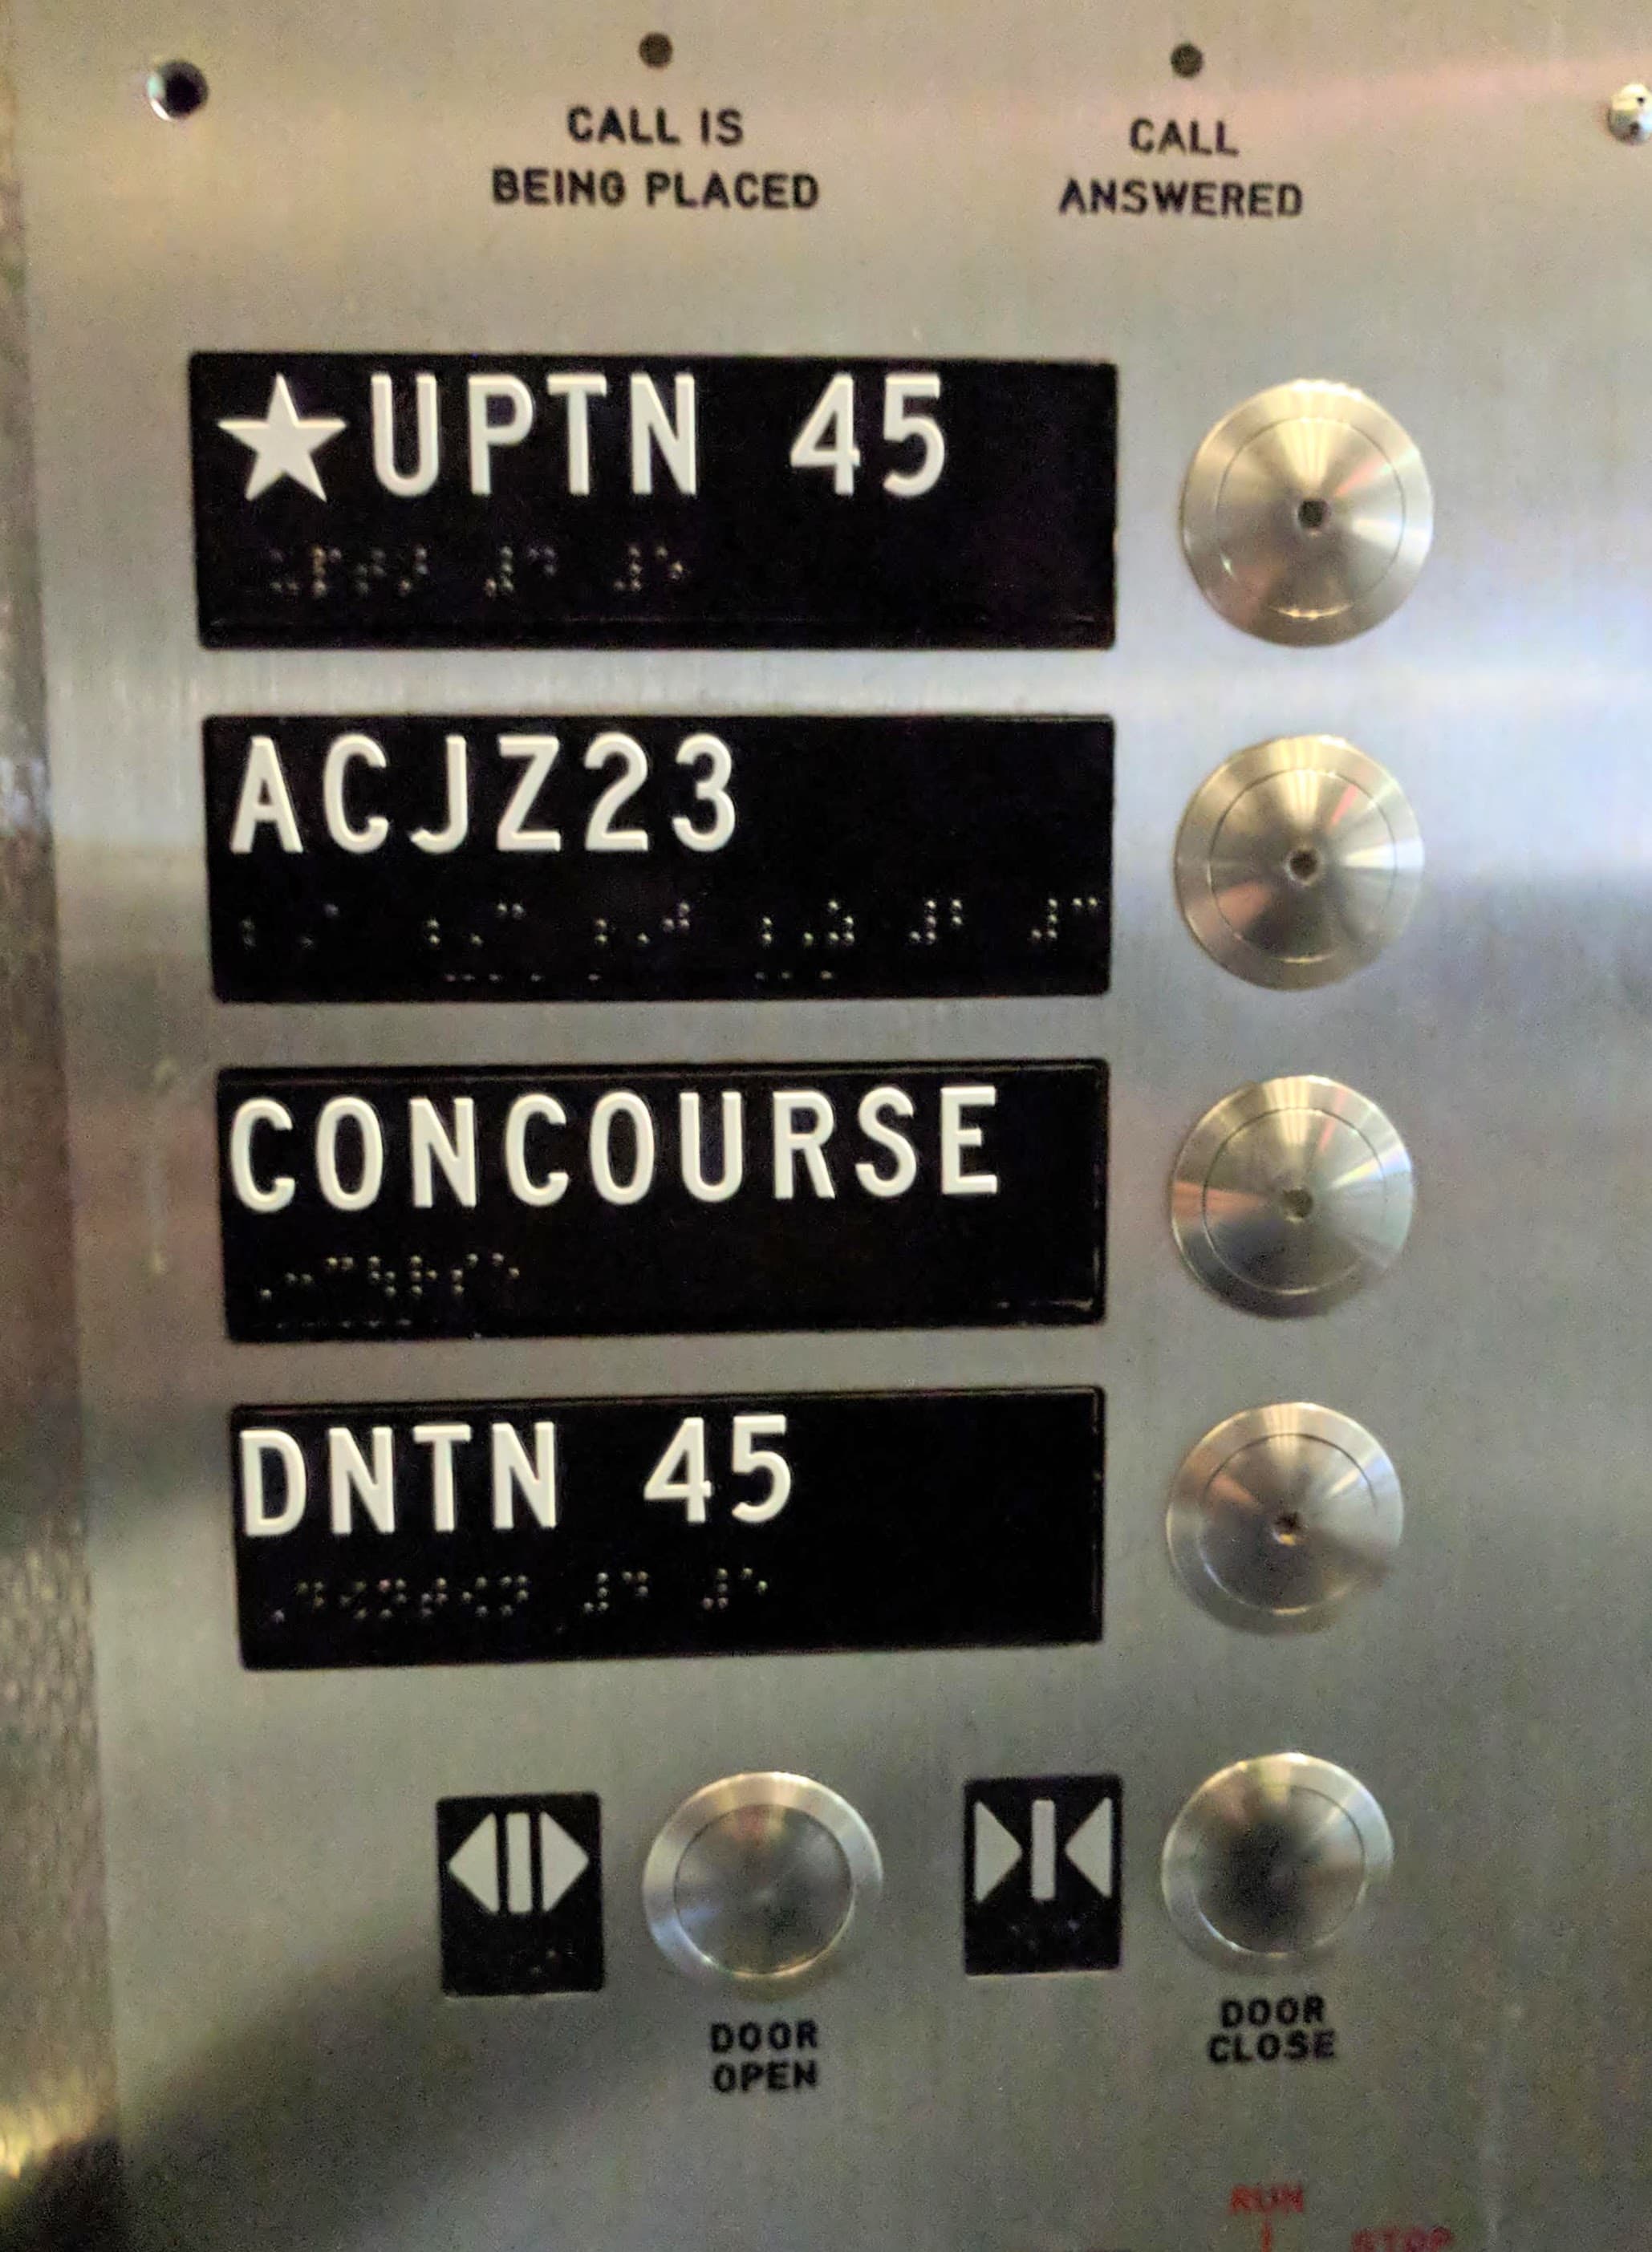
- Some elevators service multiple different subway services, so read the elevator buttons carefully: S stands for Sidewalk/Street level, M stands for Mezzanine and C stands for Concourse. Sometimes the buttons are also labeled with the appropriate train services, but this is not very consistent:
In the above example, the upper button will lead you to the mezzanine level (where you usually find the turnstiles and station booth) and the lower button is for the Northbound (uptown)
 ,
,
 or
or
 service only. If you meant to go downtown, you would have to find another elevator.
In this example above, you have four levels: The Uptown
service only. If you meant to go downtown, you would have to find another elevator.
In this example above, you have four levels: The Uptown
 trains are on the top level, the
,
trains are on the top level, the
,

 and
and
 trains are on the second level, the concourse is on the third level and then dowtown
trains are on the most bottom level.
trains are on the second level, the concourse is on the third level and then dowtown
trains are on the most bottom level.
- Be expected to take multiple elevators at a station to get to your desired platform. For instance, from the main entrance at Columbus Circle (a very popular station near Central Park), it takes you 4 elevators to get to the downtown
 train. It's also not very apparent how to get there, so I recommend looking for some local families with strollers who might know where to find the right elevator.
Once you are on the platform level of accessible stations, you should find the designated boarding area. This will be clearly labeled with a blue "Boarding Area" sign:
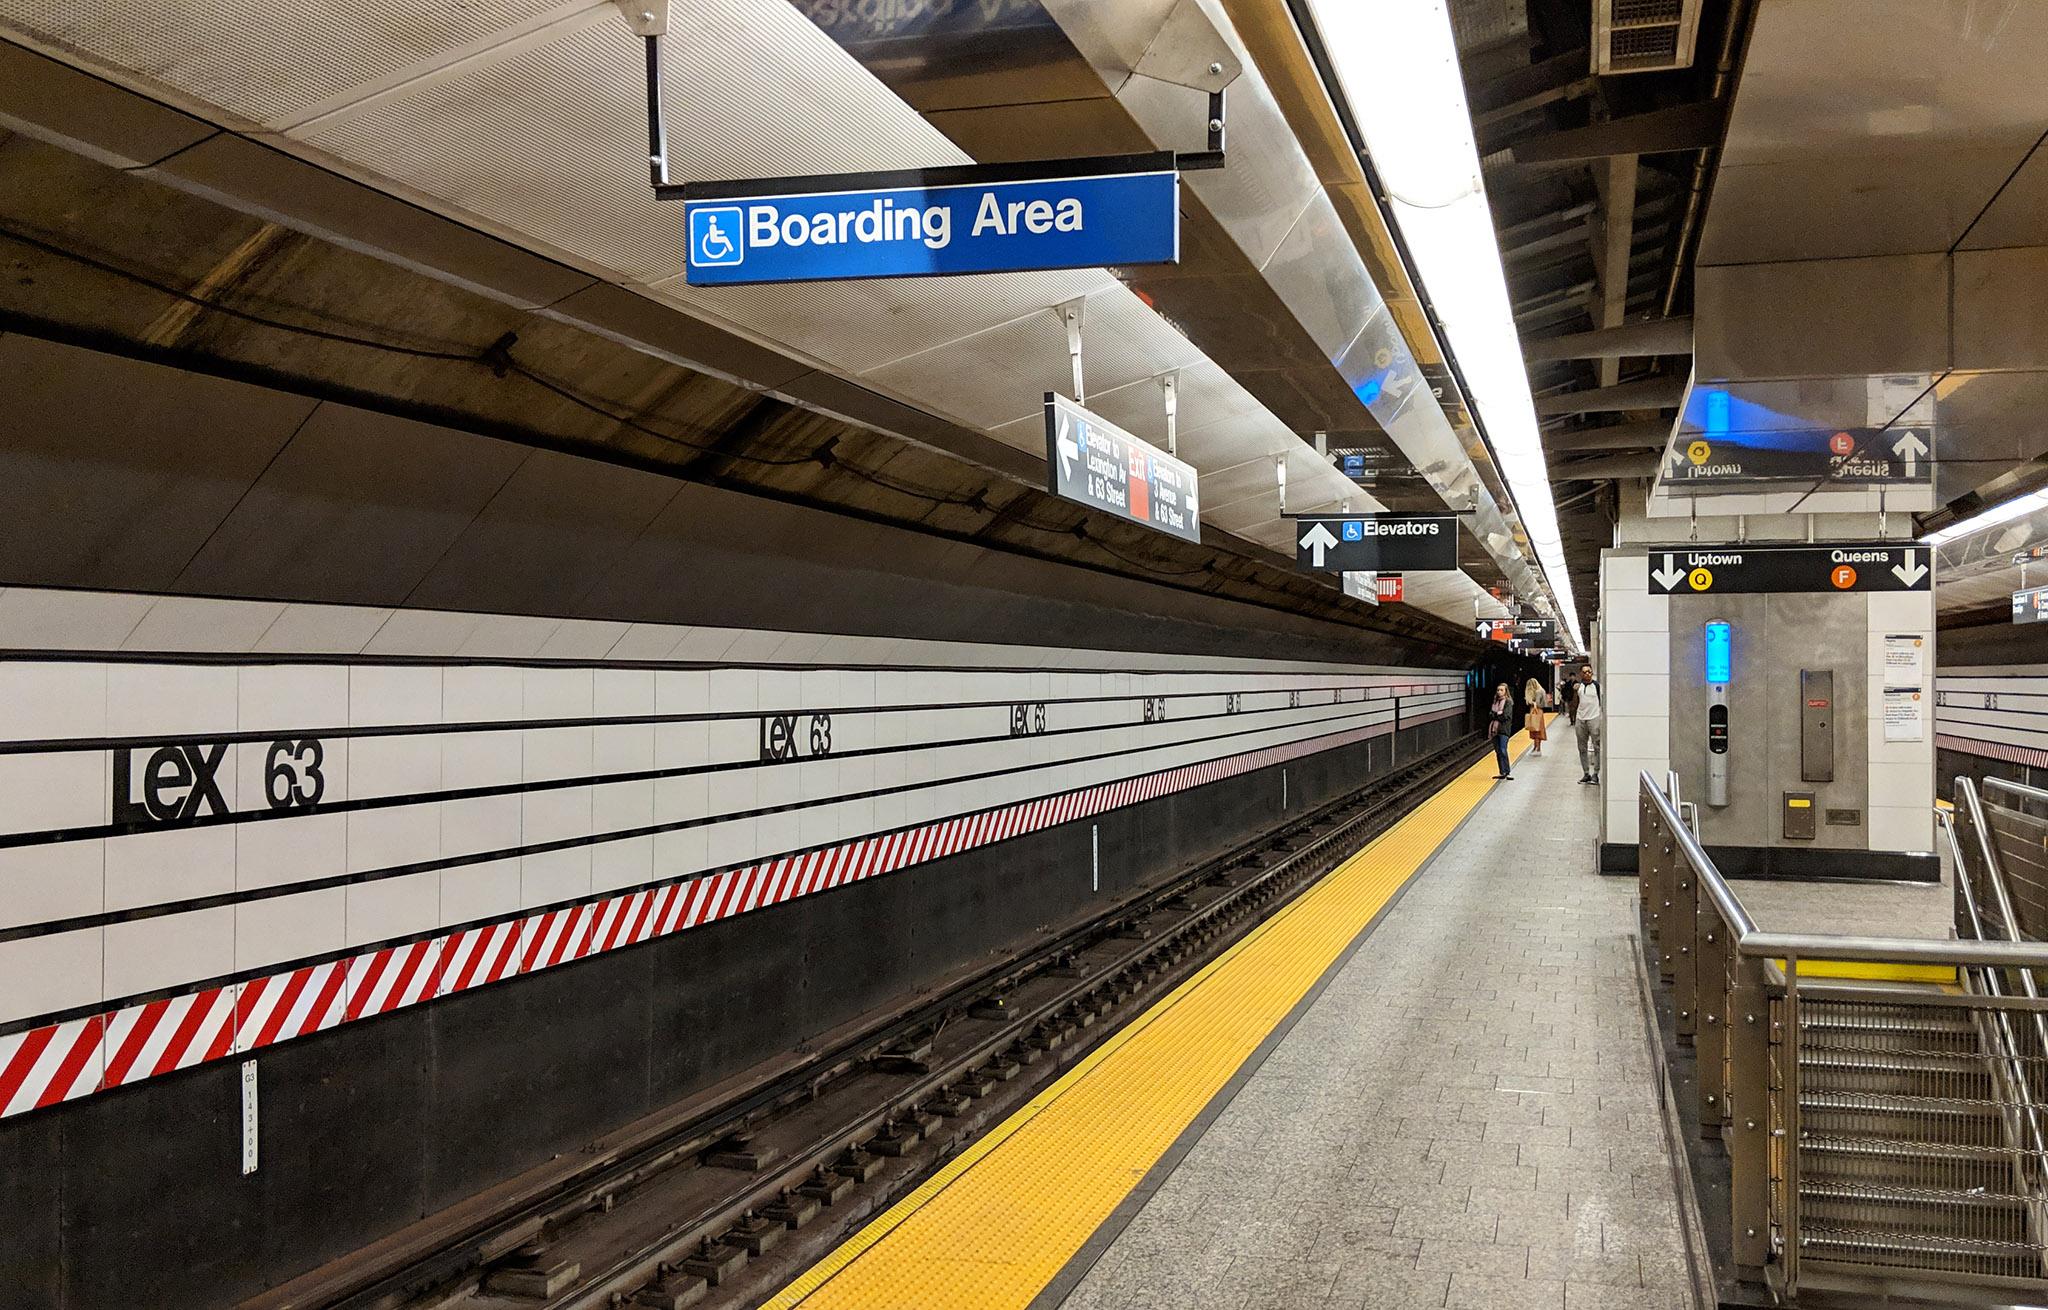
These are usually located towards the center of the platform where the train’s conductor will see you and can make sure to hold the door open longer. This boarding area also has a very slight elevation making it easier to transfer from the platform into the train easier. Note that during rush hour, the trains might be very busy making it difficult to find space to get on the train.
If you have entered one of the newer trains, you will find that the electronic display that displays upcoming train stations will also have red wheelchair sign marking stations that are accessible:
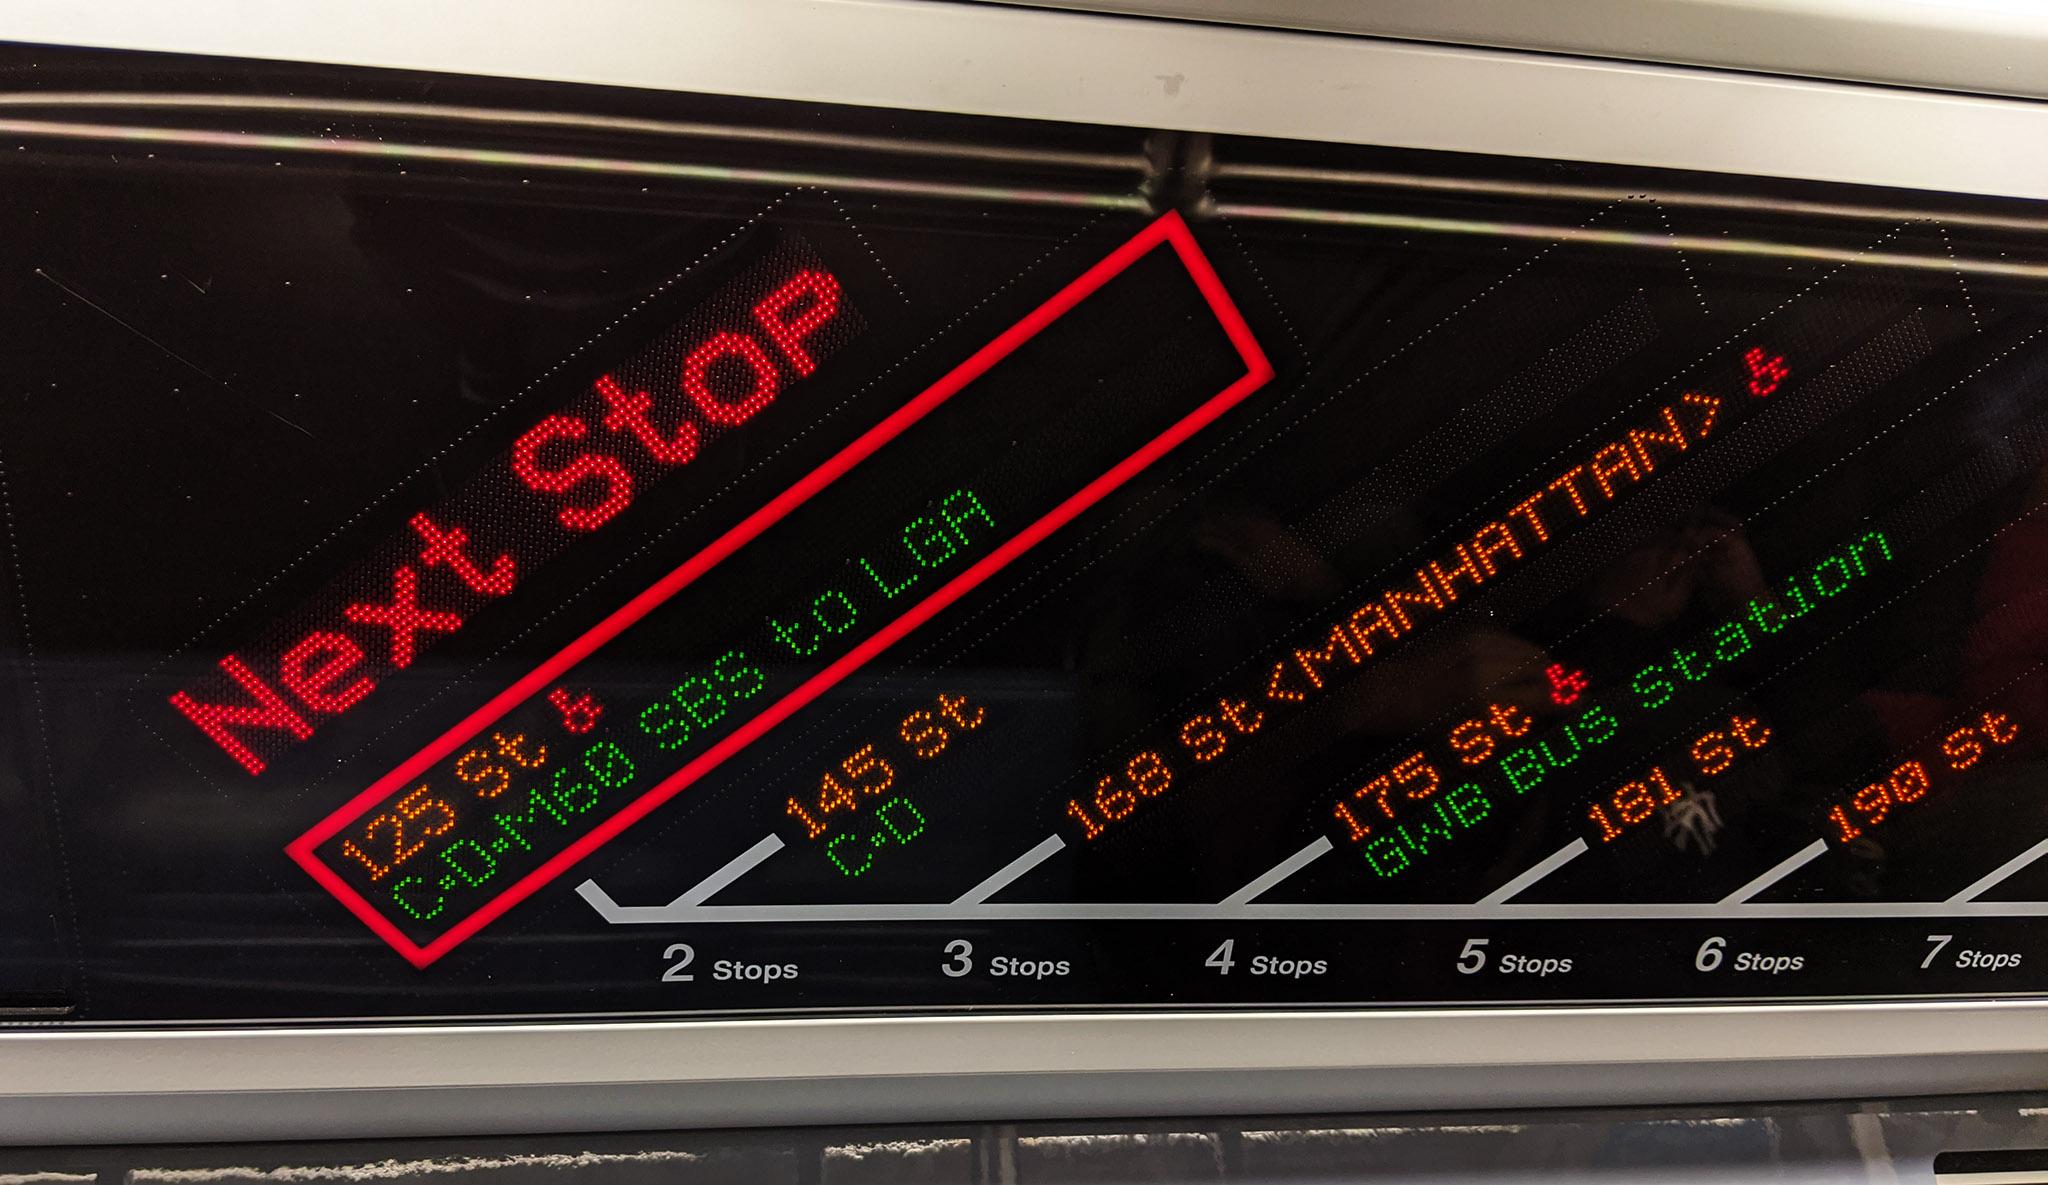
Make sure to exit/transfer at an accessible station only. When you approach a station that is accessible, the train announcement will end with "This is an accessible station. You will find the elevators at ...." (audio). As you exit a train, look for the blue or white handicap signs that direct you to the nearest elevators to either exit or transfer to another train.
If you want to exit, locate the doors next to the turnstiles. Some of them have the AutoGate machine reader next to it:
In that case, just use your MetroCard or your OMNY device at the AutoGate reader to have the door automatically open for you. However, some doors don't have the AutoGate machine reader and are just labeled emergency exits:
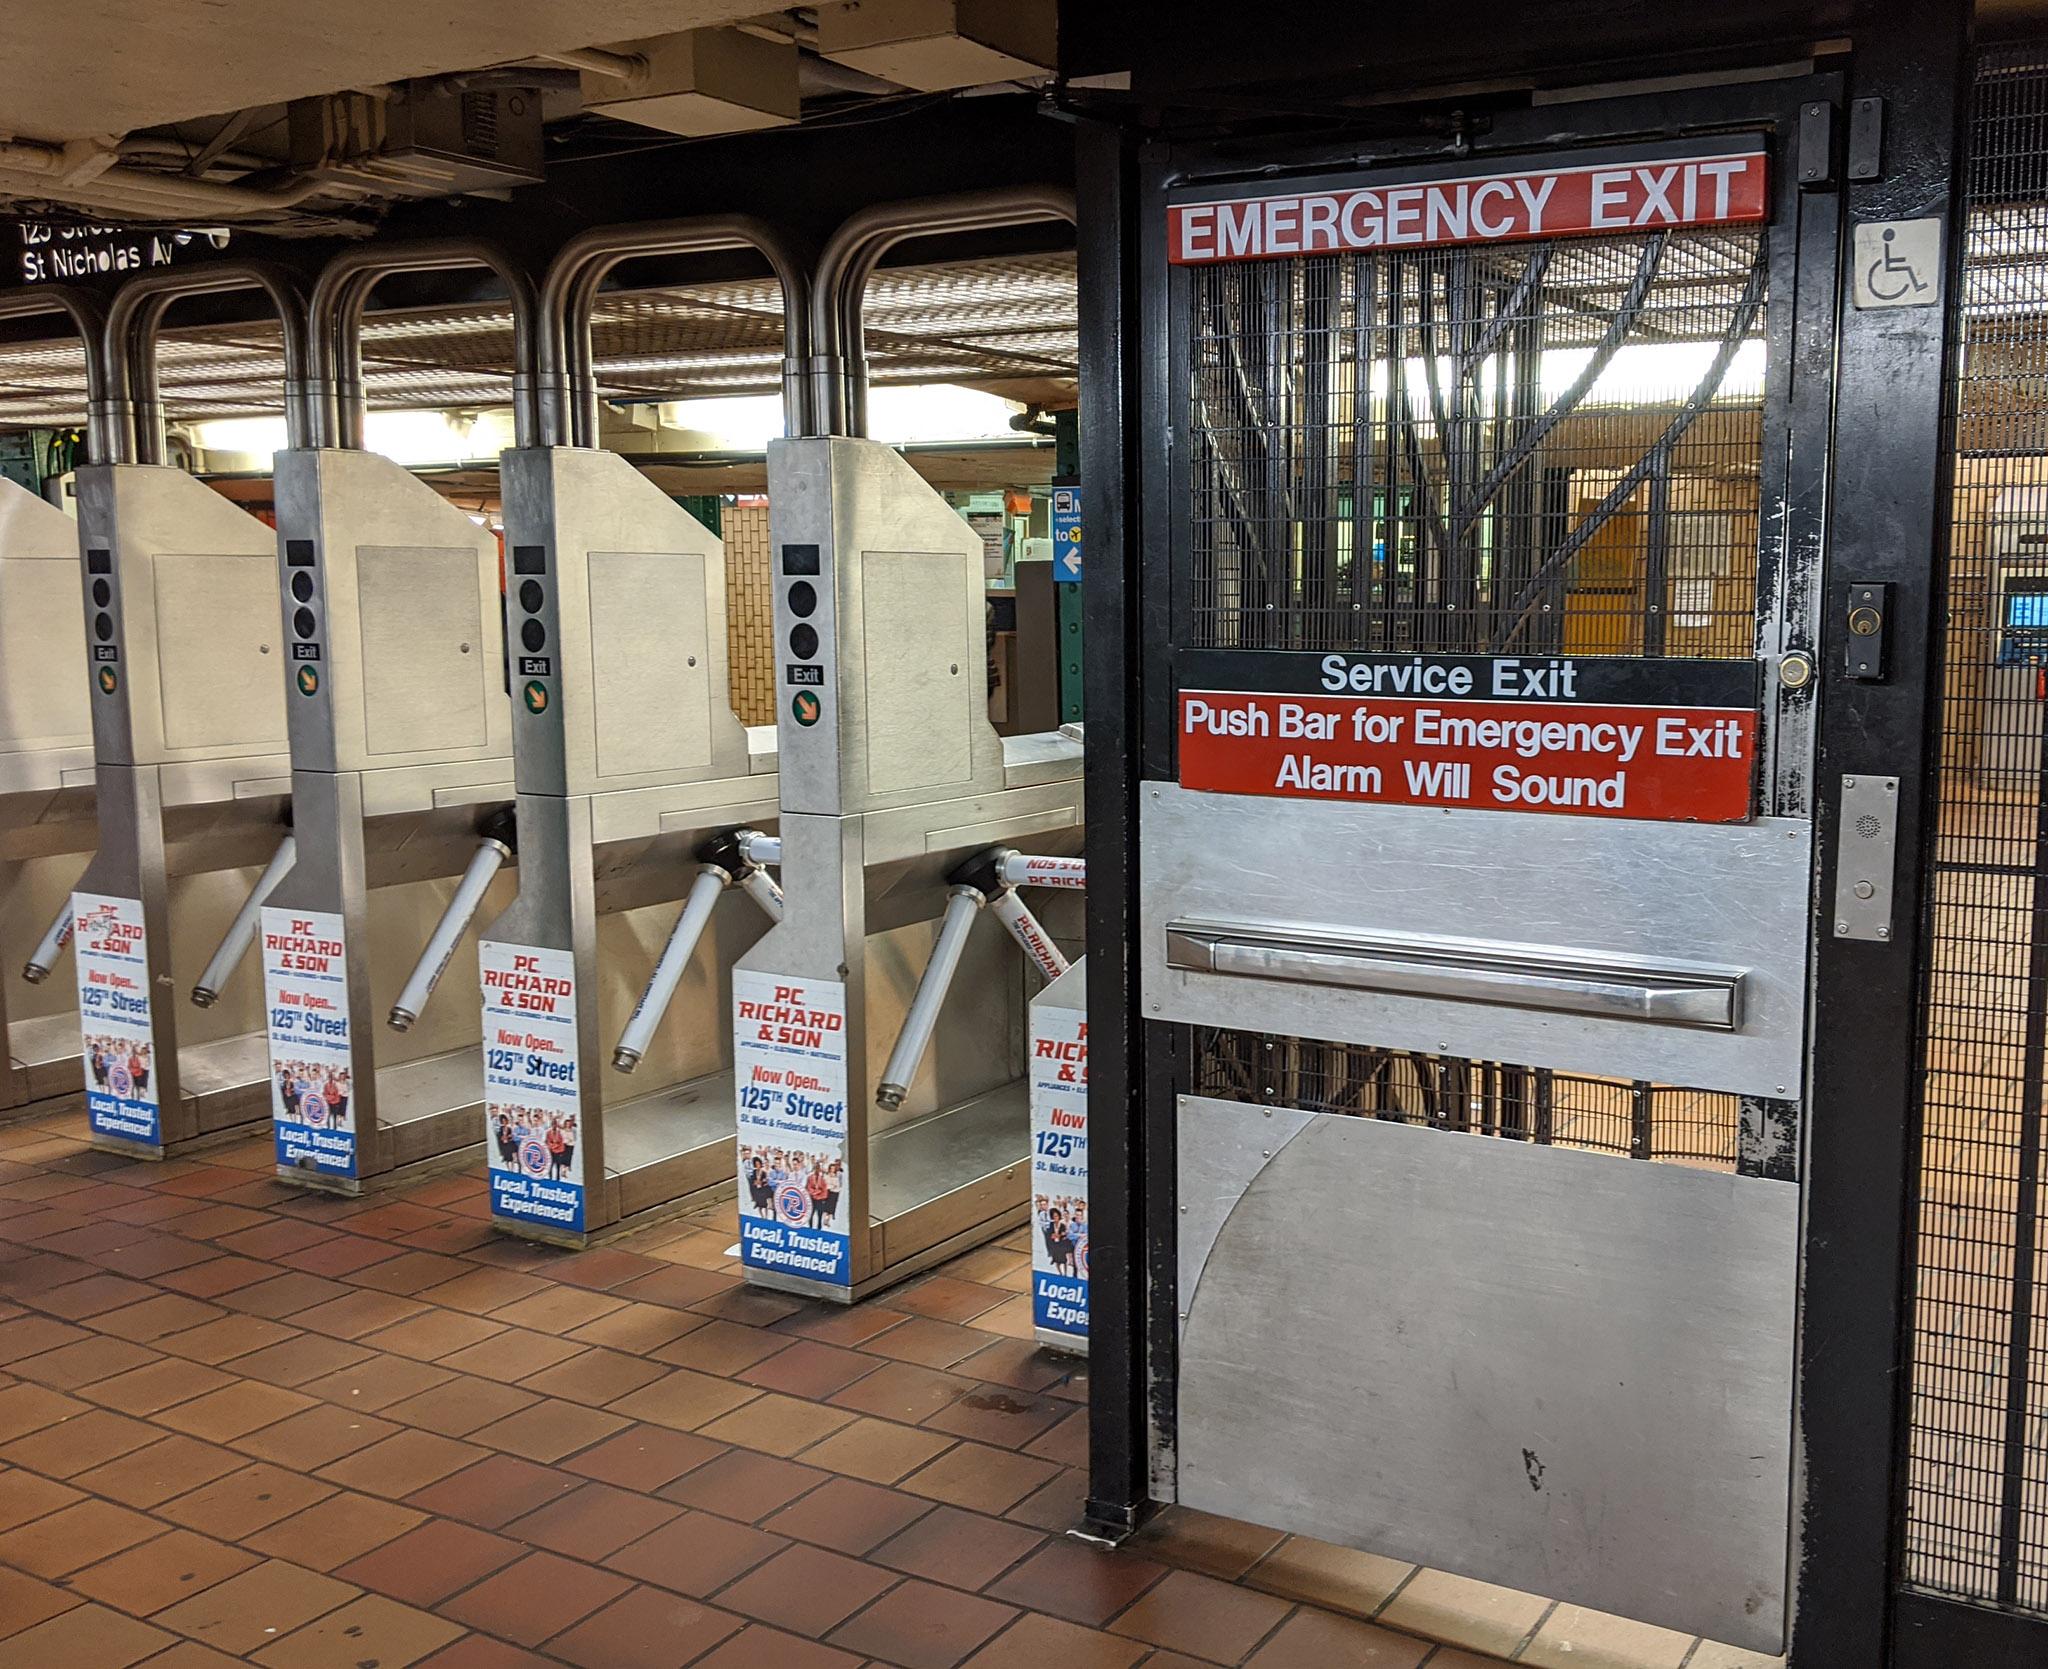
In that case, simply push the service door open from the inside to open. Despite the warning that an alarm will sound, it almost never does, and many New Yorkers use those emergency doors for their daily commute when it's crowded.
As one would expect, taking the trip using elevators or only accessible stations will take a significant amount of time. It’s very typical that your entire journey might require 4-6 different elevators. For more details and resources about accessibility see the MTA’s website on this topic.
Alternatives / Access-a-ride
Given the poor accessibility conditions of the subway, another way to travel in NYC is to avoid the trains altogether. All NYC buses have retractable, ADA-accessible ramps. The bus driver will also help secure your wheelchair to the appropriate place. Note that uncollapsed strollers and bikes are not allowed on the bus. You must collapse down a stroller or bike to bring it on the bus. Many ride hailing apps and taxi cabs also have support for wheelchairs.
The MTA also has the Access-a-ride (AAR) program that consists of accessible vans and car shares available 24 hours a day, 7 days a week that provide door to door service for eligible customers at the base price of a subway fare (i.e., $2.90). These are shared-ride vans with accessible ramps that require prior reservation but can pick you up at any desired location.
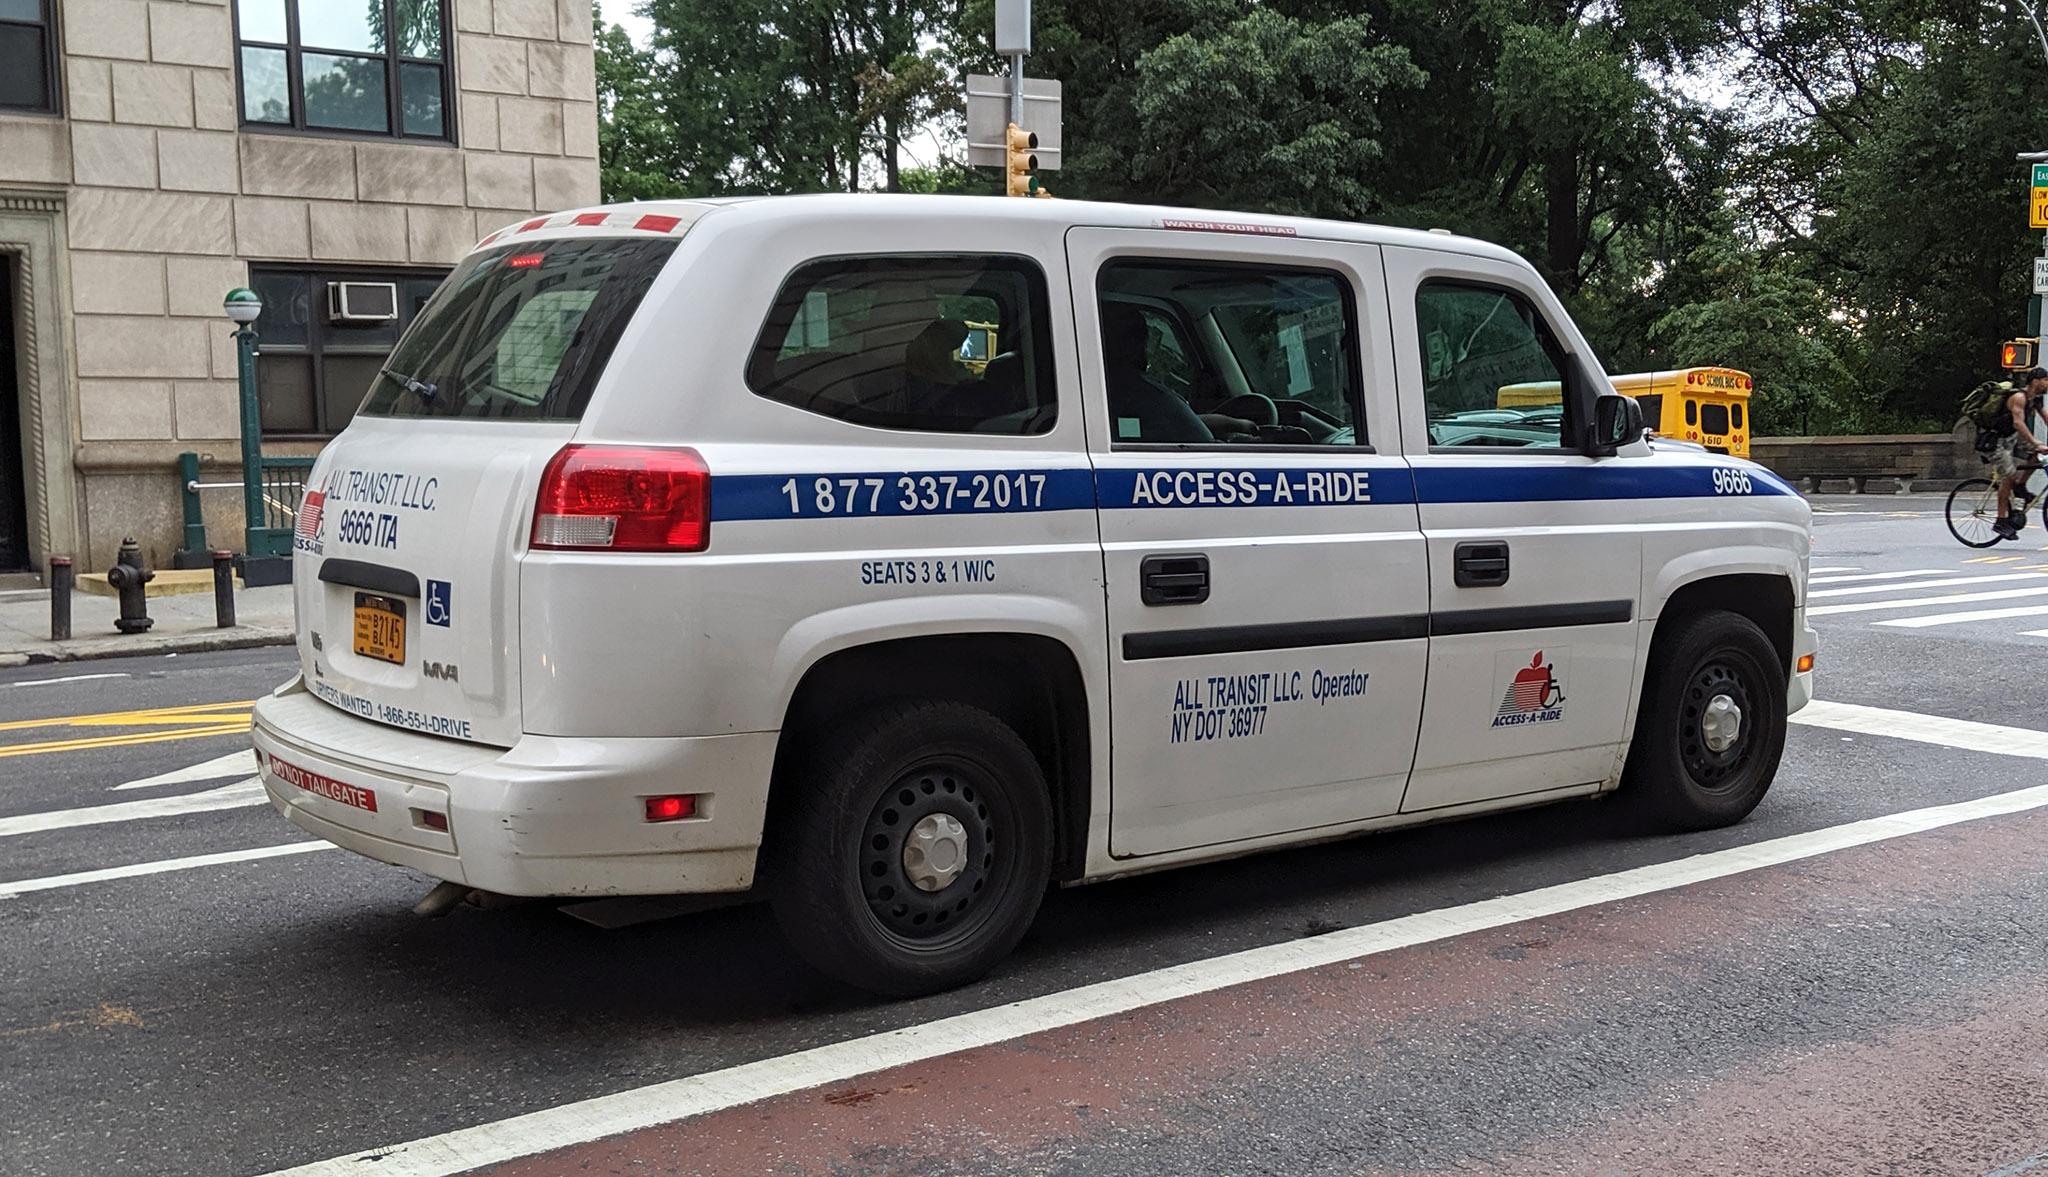
Depending on the eligibility of the person, these rides can truly be door-to-door or just door-to-an-accessible subway station. Personal Care Attendants that accompany the AAR customer will also be able to ride for free. Sometimes, the MTA also employs taxis and private car shares to complement the service, but the process of reserving one is the same. In addition, AAR customers can use the regular public transportation (subway and buses) for free four times a day. This is useful given that all NYC buses are ADA-accessible with ramps and can take you to the nearest accessible subway station.
To receive AAR benefits, one must first apply. The entire application includes an in-person assessment and might take up to a month to complete and is therefore not really practical for tourists. The application must be accompanied with documentation from a medical professional or service provider demonstrating your difficulty in using public transportation. After the in-person assessment, you will then be assigned one of these AAR categories:
- Full: This means that you can use AAR as a full door-to-door service anytime of the day and the year.
- Conditional: This means that you can use AAR under certain conditions only. For example, you can only use it when it rains/snows or you can reserve AAR only to get you to the closest accessible subway station.
Your AAR eligibility can be permanent (requiring a renewal only every 5 years) or only temporary until your medical condition is expected to improve
To apply for AAR, call 877-337-2017 from NYC area codes or 718-393- 4999 from elsewhere or fill out the application online.